VIEW THE GALLERY
Picture this: it’s a sunny Saturday afternoon in the park, the perfect setting for lounging with friends and capturing memories. Just as you’re about to snap a photo with your phone, your friend suggests something better. From their bag, they pull out an unusual camera, a fusion of retro Polaroid charm and sleek modern hardware.
With a flash, a photo emerges. But instead of a flat snapshot, you hold a watercolor painting in your hands. The park and your friend are still there, yet transformed - softened into dreamy brushstrokes, serene and whimsical, as if lifted from the pages of a storybook.

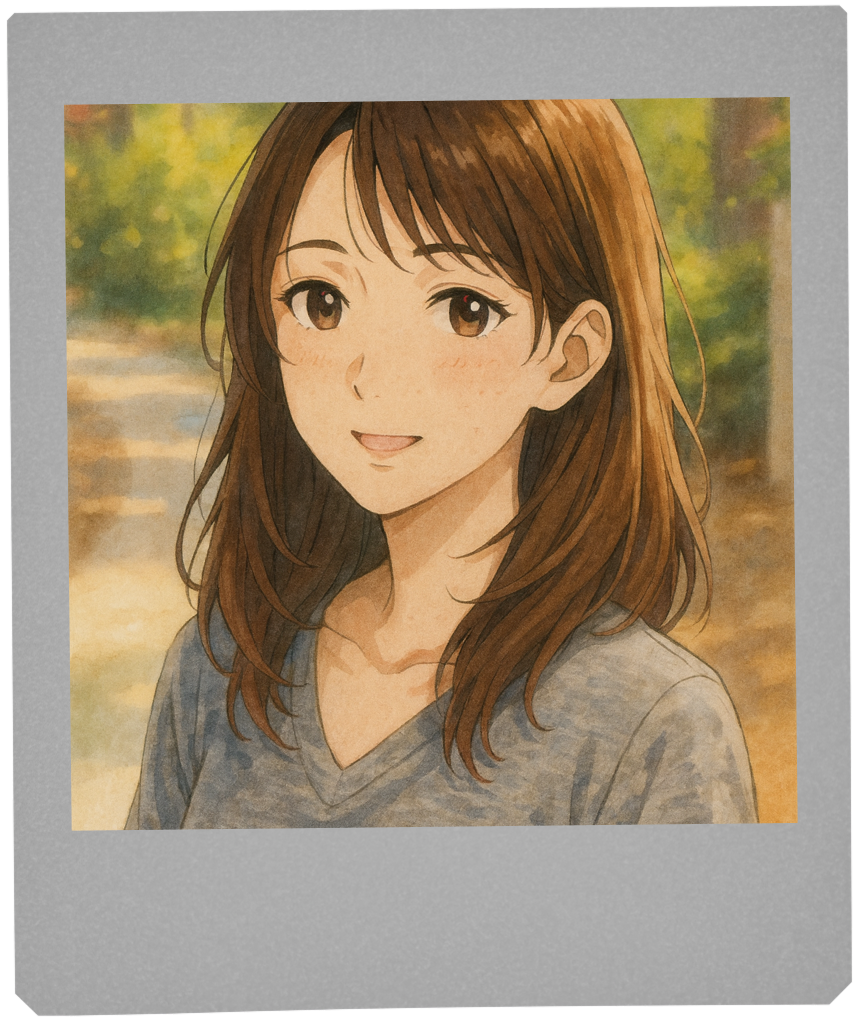
Welcome to Visionairy Cameras. These devices don’t just capture moments, they reinvent them. Using custom-built hardware and AI-powered restyling, Visionairy cameras create tangible works of art, blending old-world craft with the possibilities of modern technology.
What began with the Instagen, a handheld instant-print camera, soon grew into the Luminaire, a sleek pocket-sized digital camera built for both photos and video. Together, they form the Visionairy line: an exploration of how hardware, software, and AI can come together to reimagine what a camera can be.
Building these cameras became my most challenging and rewarding project to date. It was also my first real insight into what’s now called vibecoding - working hand-in-hand with AI to explore, prototype, and refine a system from the ground up. I developed a workflow that allowed me to design, build, and iterate quickly, using AI not just as a tool but as a collaborator. Visionairy Cameras pushed me to reimagine how I work, and in the process, revealed new ways that designers can create with technology itself as a partner.
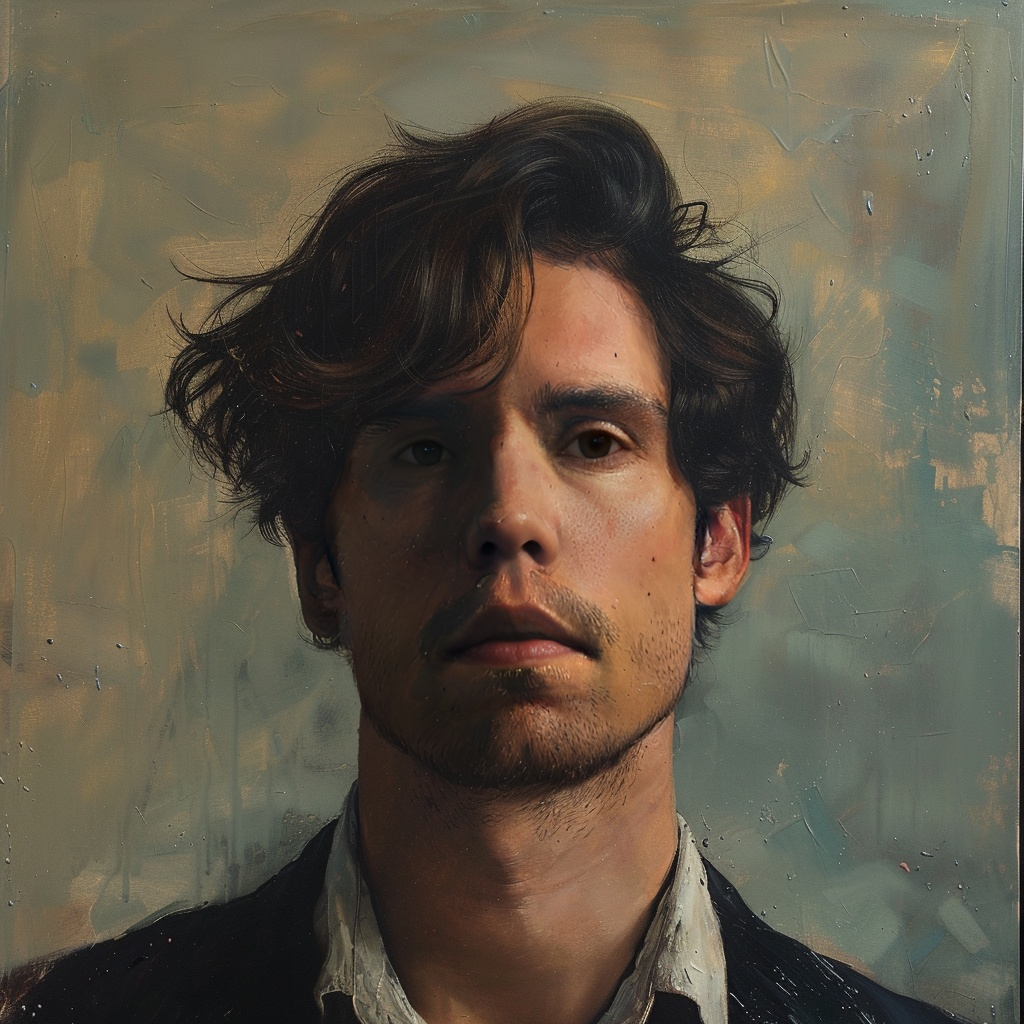
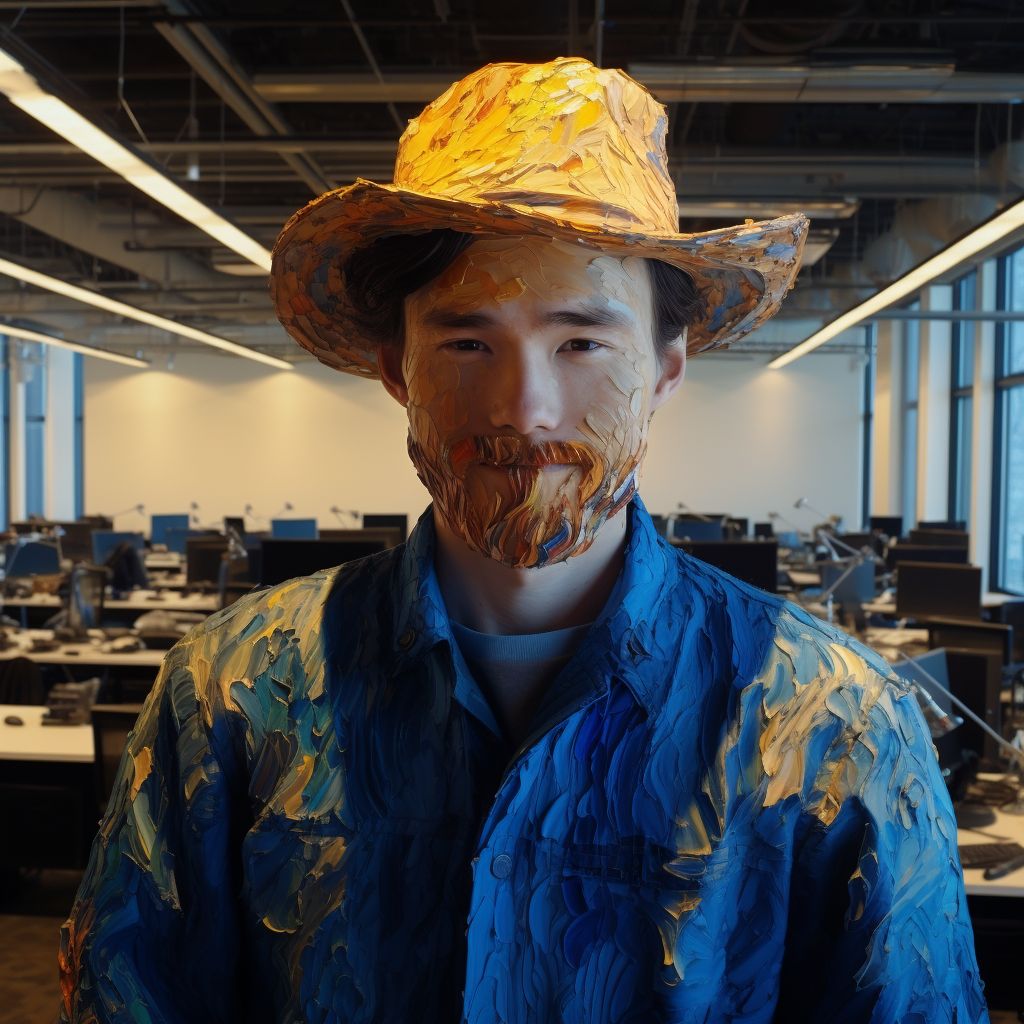
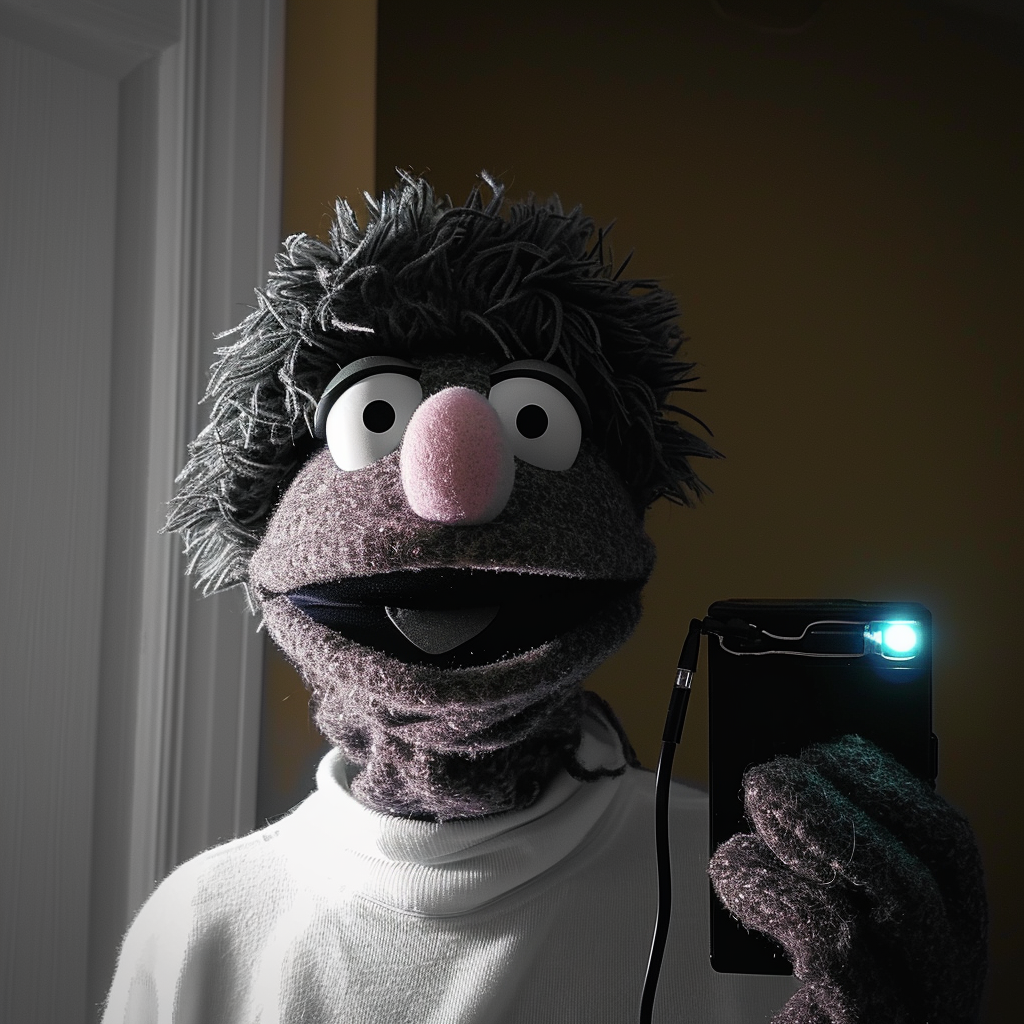
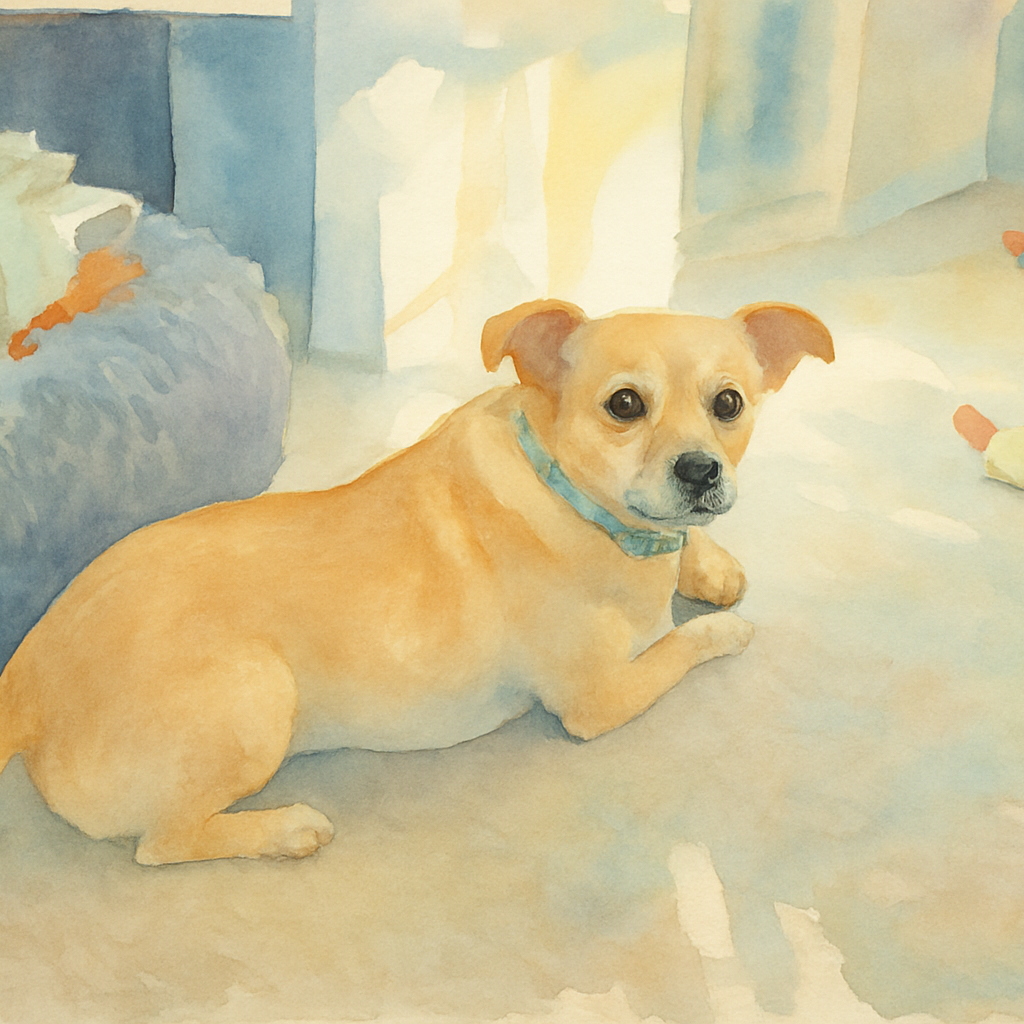
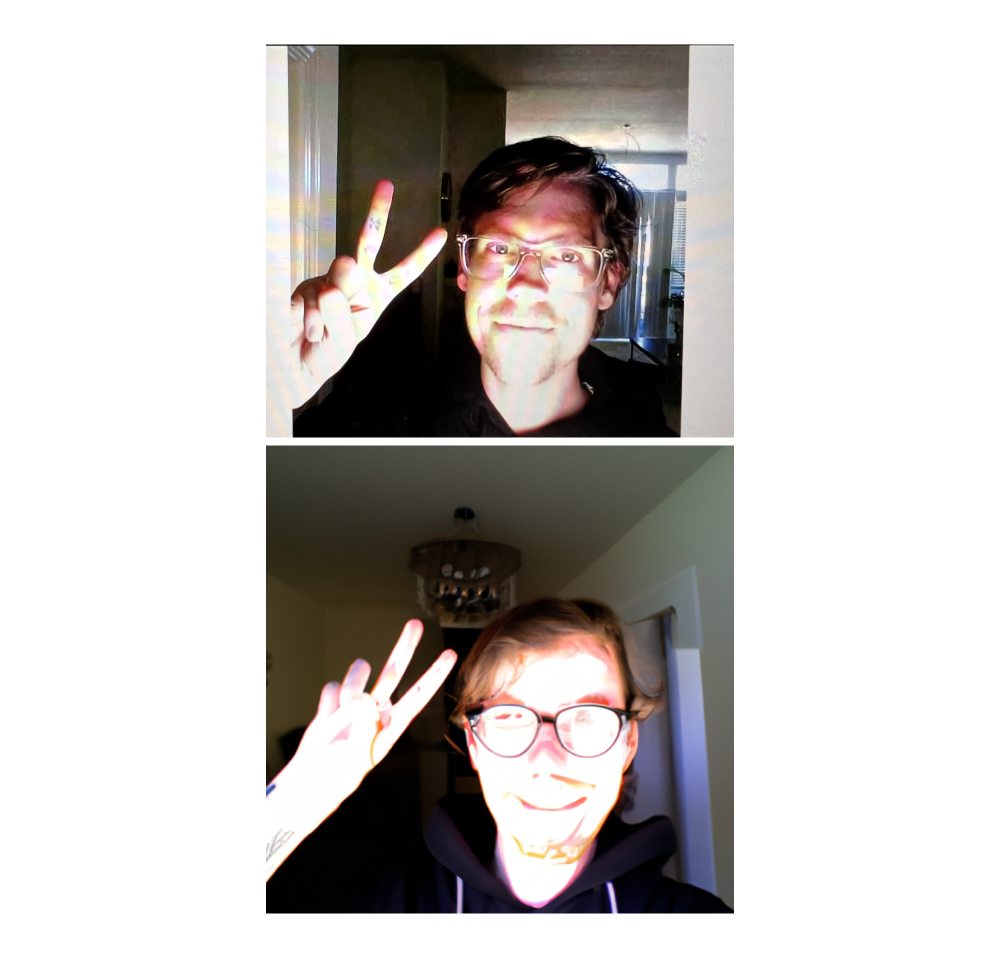
But before diving in, why not take a look at the Generative Gallery to see some of the shots that I've taken with the Instagen? If you don't want to, these four images below are some recent images I've taken.
This is a big project with multiple parts. If you want to jump straight to the details about a particular camera model, click the one you are interested in.
If you want to read about the backstory of the project, why I built it, how it works, and what my plans are, just keep on scrollin. You'll eventually land on the individual camera details at the end.
Menu
This is a big project with multiple parts. If you want to jump straight to the details about a particular camera model, click the one you are interested in.
If you want to read about the backstory of the project, why I built it, how it works, and what my plans are, just keep on scrollin. You'll eventually land on the individual camera details at the end.
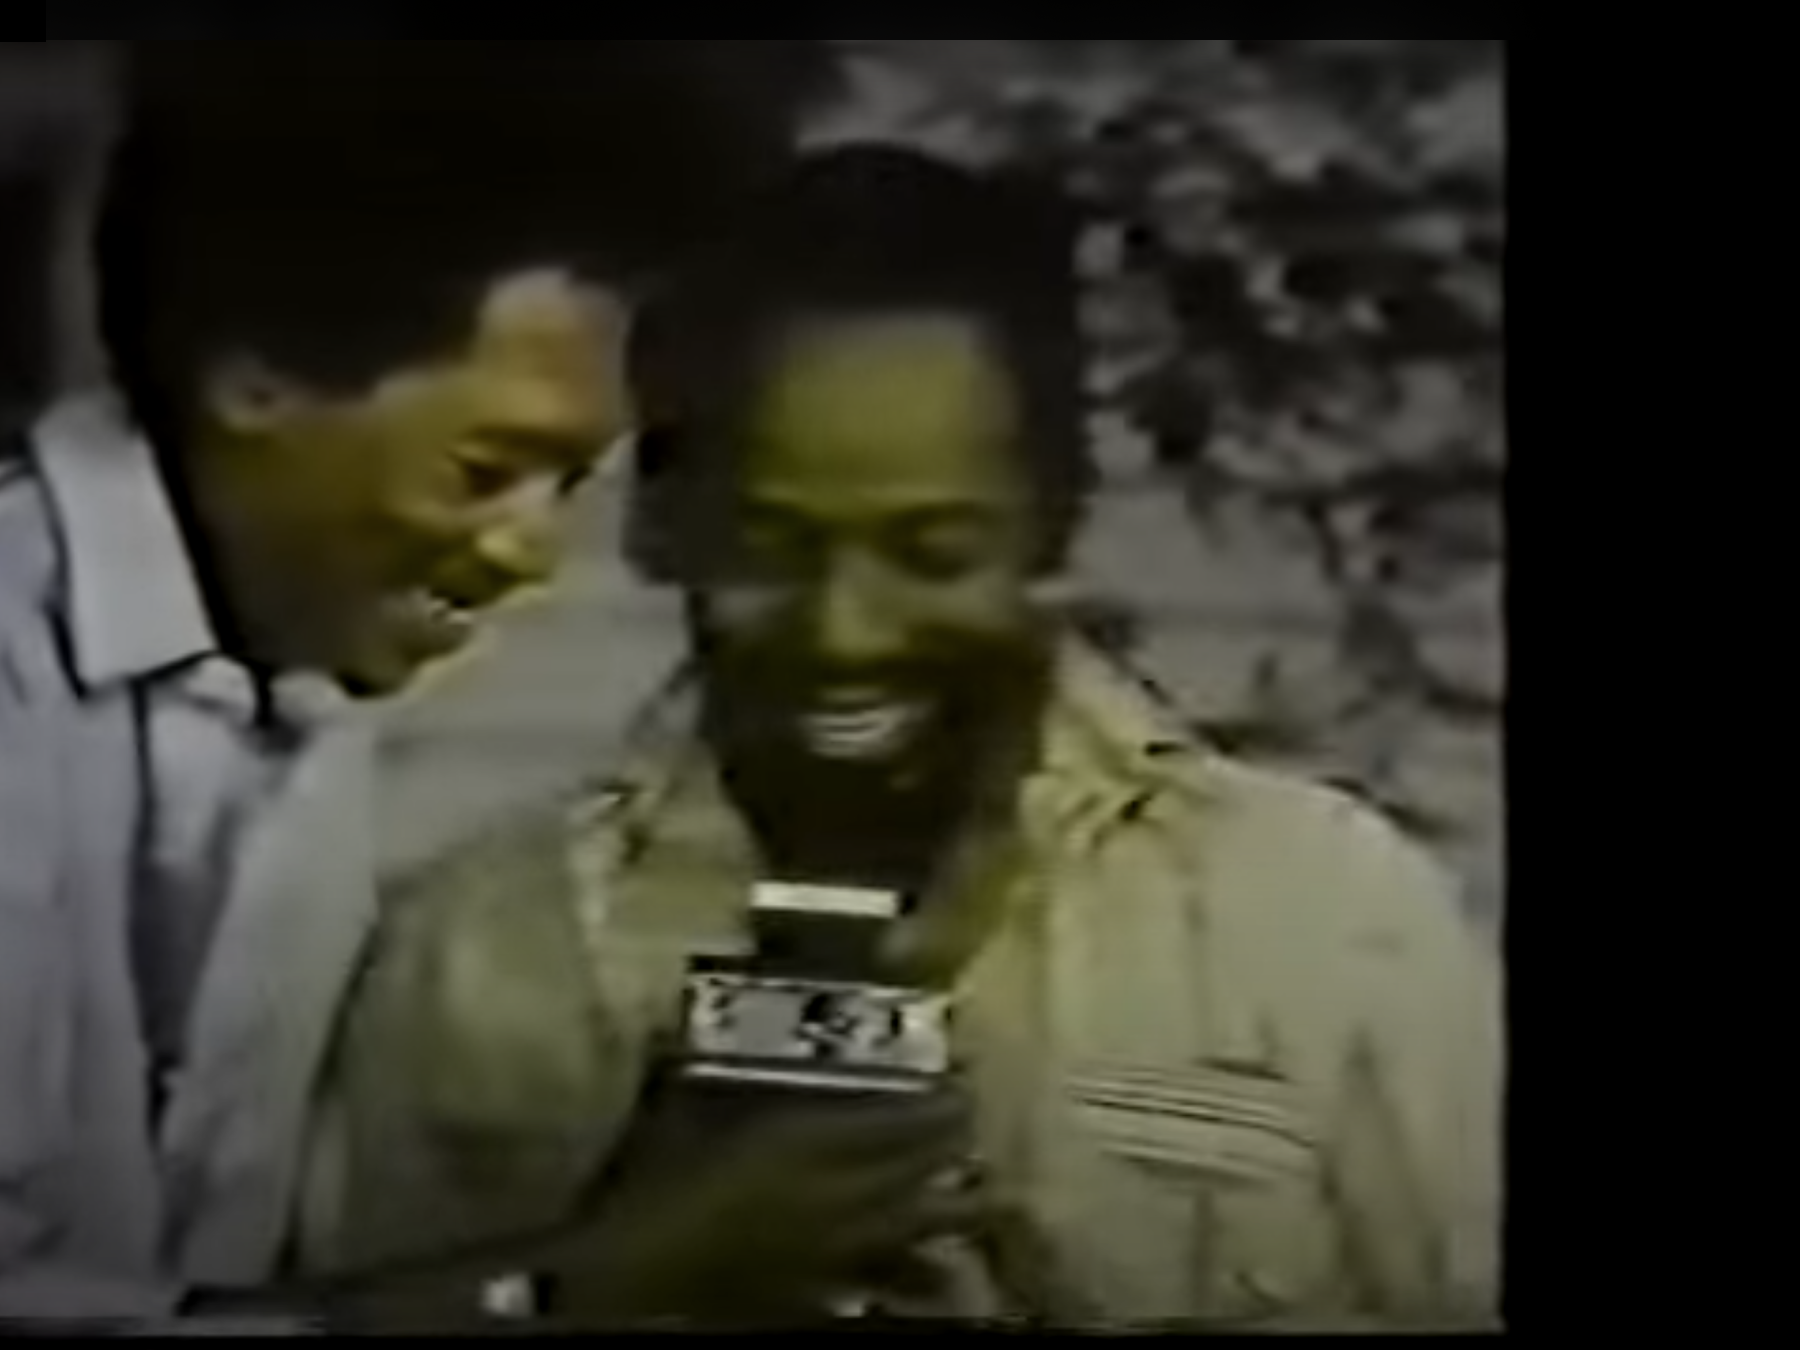
In April 2023, a seemingly insignificant Reddit post caught my eye and changed everything. It was a Polaroid commercial that aired in 1975, but not just any commercial - it starred a young Morgan Freeman demonstrating the magic of capturing and printing moments instantly. Sure, Morgan Freeman was cool, but it was the Polaroid camera that struck a chord.
It took me back to my first memories of a Polaroid. I must have been four or five, standing in my grandma’s kitchen as she lifted the camera and snapped my picture. The machine whirred and out slid a white square. “Here, hold this and fan it back and forth like this,” she said, placing it in my hand. I waved it eagerly, caught between anticipation and wonder, watching a moment materialize right before my eyes. A slice of time, instantly captured and held in my hands.
Today's cameras, while technologically superior, miss that tactile, nostalgic essence. Millennials like me briefly knew the era of film before the digital wave took over, leaving us with a subtle longing for something more tangible. Instagram and the rise of 'hipsterism' partly filled this void and breathed new life into the art of photography.
Gen Z's relationship with technology is complex. They are digital natives, yet they often find themselves drawn to more tangible, 'retro' technologies. This is evidenced by the revival of film photography. Kodak's film sales, for instance, have seen an uptick of roughly 5% year-over-year in the last few years, indicating a renewed interest in the medium. Retailers like Urban Outfitters are capitalizing on this trend, selling refurbished Polaroid cameras at premium prices. Disposable cameras become a hot commodity every summer, particularly among high schoolers.
Parallel to this retro resurgence is the advancement in AI image generation. Tools like Dall-E, Midjourney, Stable Diffusion, and others represent a frontier in creative technology, turning words into images and reimagining existing pictures in novel styles.
Caught between these two worlds, I saw an opportunity. What if we could merge the physical, nostalgic appeal of film with the creative potential of AI? A camera that not only captures moments but transforms them through AI, then prints them out – a blend of old and new, tangible and digital. Had anyone done that before?
How hard could it be?
In case it wasn’t obvious, I’m a designer through and through. My focus is the craft: visual aesthetics, clear flows, beautiful patterns, exciting and useful features, and making experiences feel just right.
I can’t stand when an idea sits just out of reach. If I can picture it, I need to make it real. Side projects are my favorite way to learn because they force the issue. They are the perfect way to pick up new skills as having a solid objective makes the learning stick.
For this project I taught myself modern development workflows in VS Code, worked with AI tools like ChatGPT and Gemini (omg and ever since Codex dropped...), learned how to model parts for 3D printing, and got a lot more comfortable with electronics and soldering. I even tried 3D printing circuit boards. Didn't work.
I didn’t become a full-time engineer, I learned how to build with AI. Cool kids call it vibecoding. ChatGPT became my co-builder, helping me move from idea to a working device. And now... I feel like can build anything.
I want to design and build a modded shell of a Polaroid camera with custom electronic components. The camera will capture a photo, uploads the photo to the OpenAI DALL-E API endpoint, process variations of the captured image, download the processed image, and print it onto Polaroid film. This modified Polaroid camera will use a digital camera module connected to a Raspberry Pi and a Polaroid film printer.
I want you to prepare a development plan with all of the necessary steps to make the software and hardware for this camera, including which APIs and services I should use, and which scripts I should write.
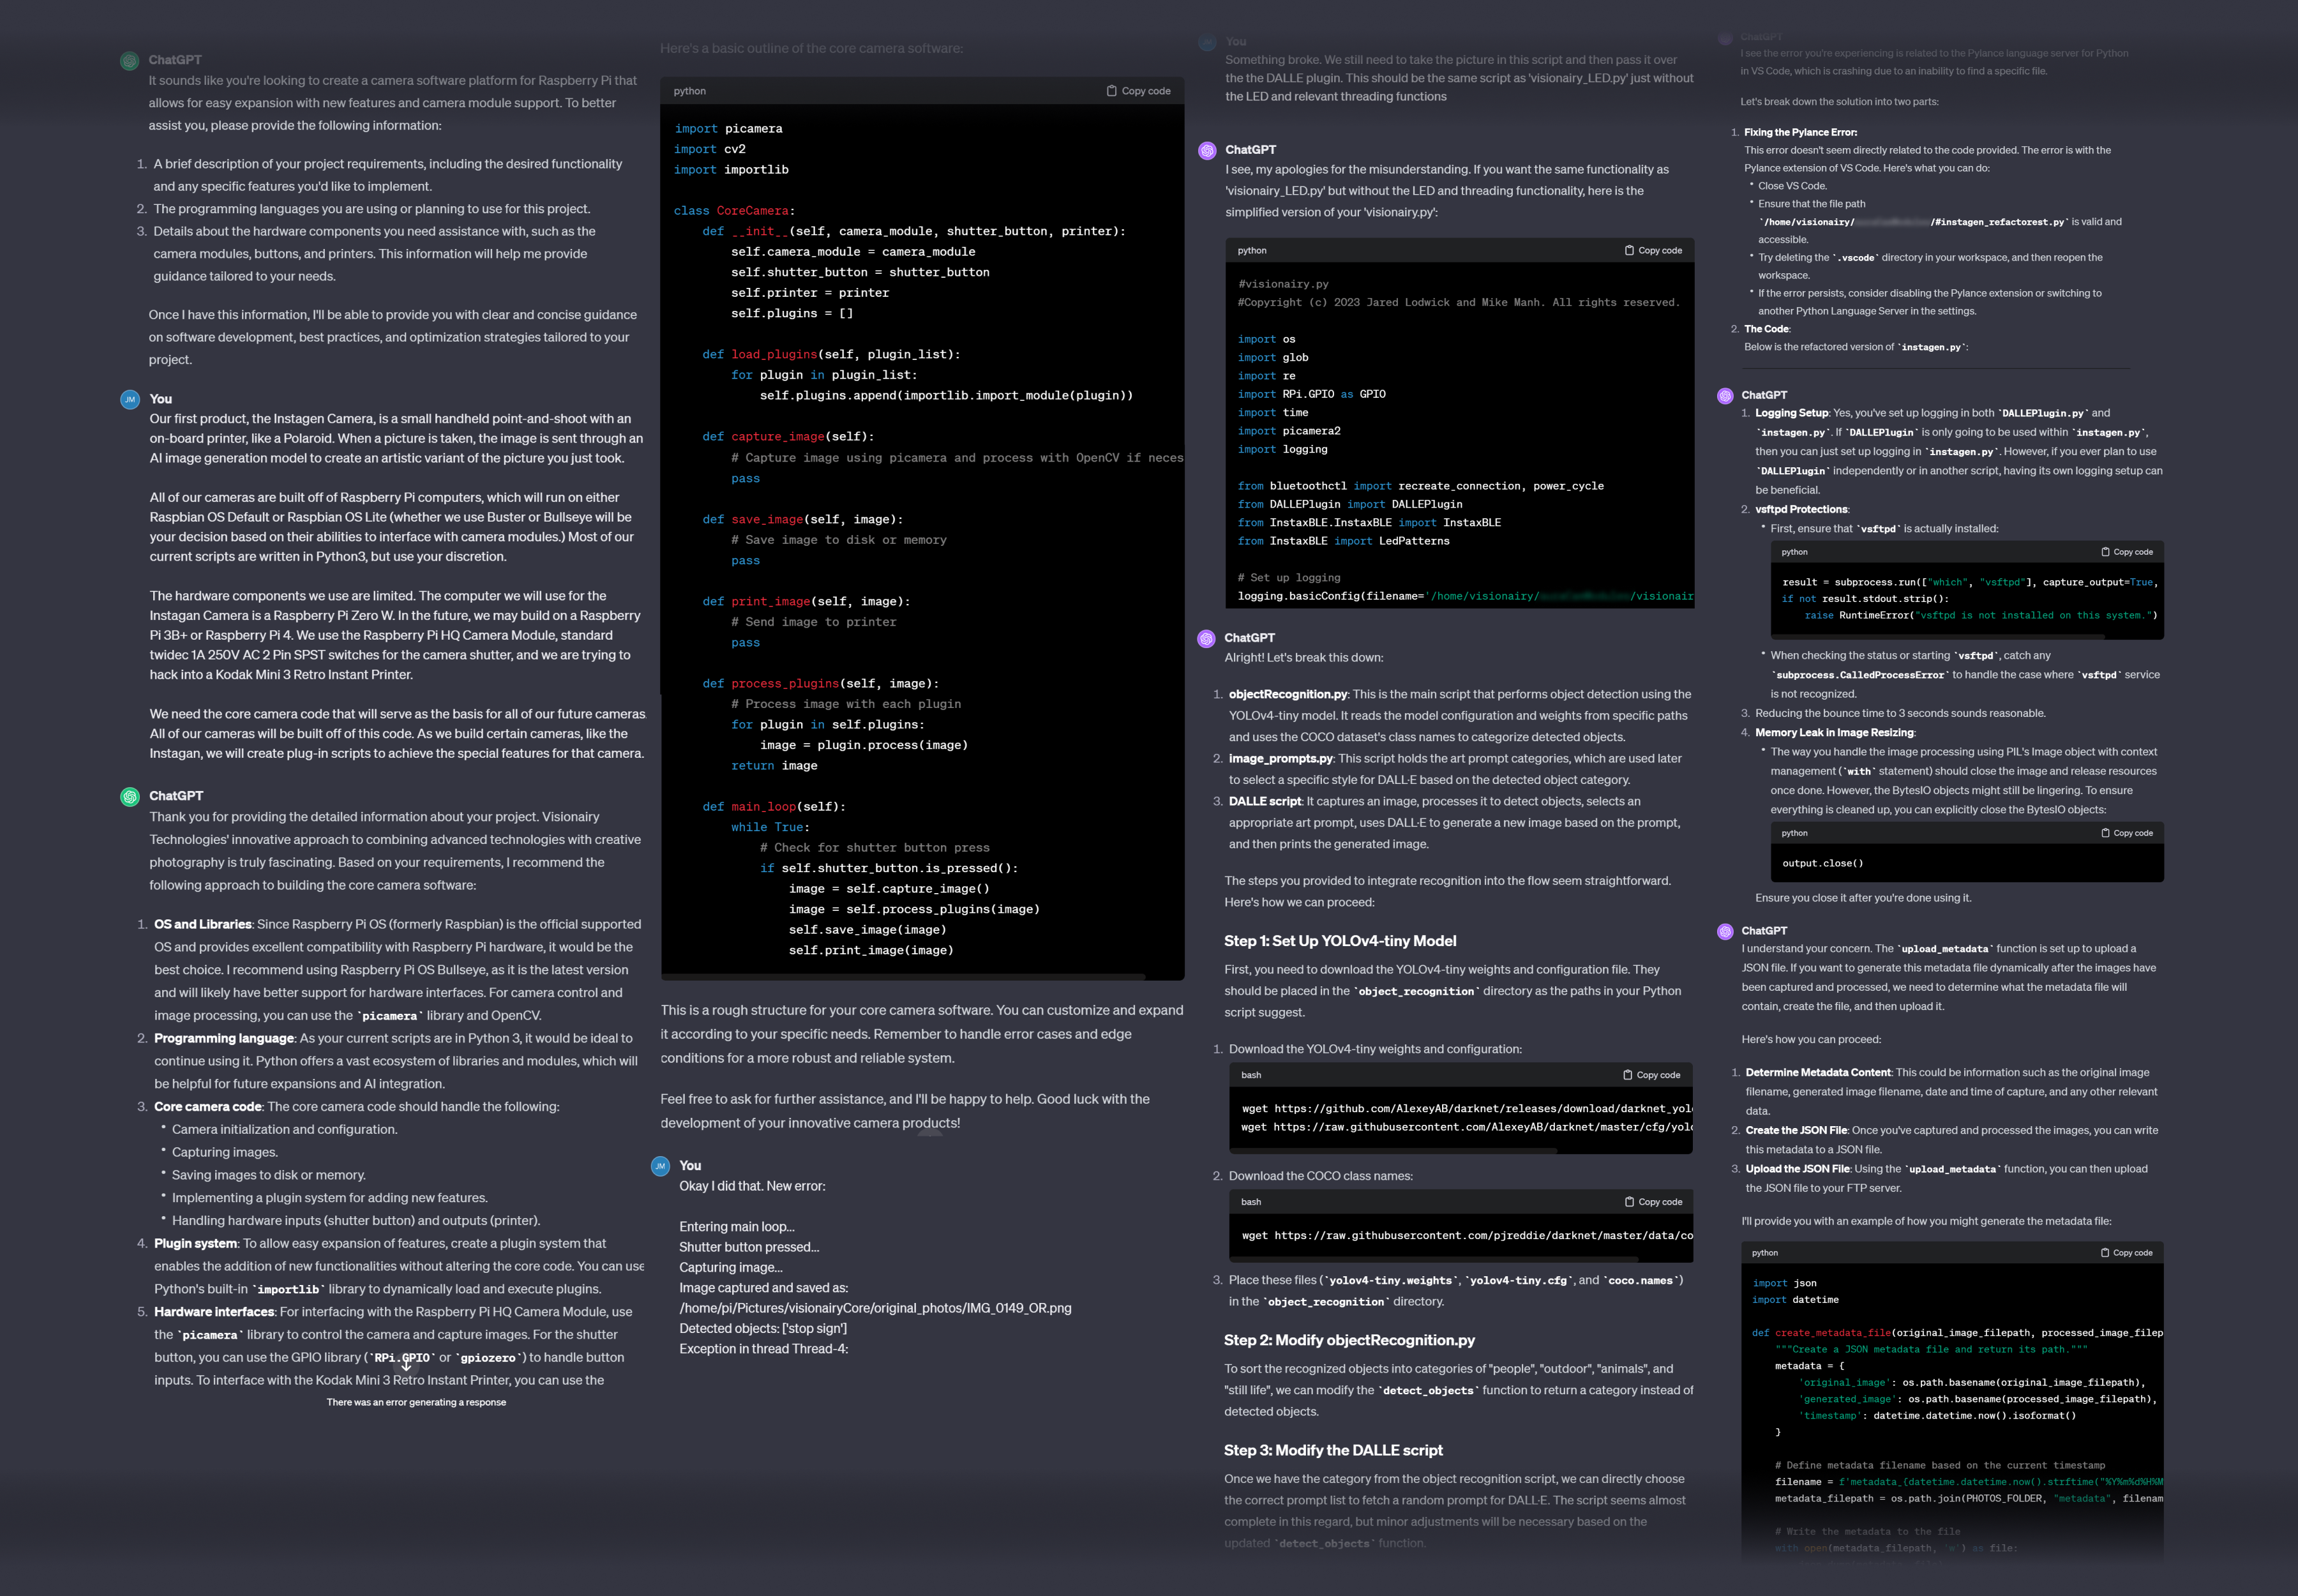
As it turns out, ChatGPT is great at writing code. Sure, this may be common knowledge now, but at the time I started, this was cutting edge stuff! And I won't lie, it was really easy. It's very similar to working with an engineer, but with our interaction only being through text and me serving as the implementer and tester of code.
Not all of it was written by the bot. The printer implementation, which is a critical piece of the puzzle, was implemented by the incredibly talented Mike Manh - a real developer, via an awesome repo built by Javl. Mike joined me over the summer of 2023 as a technical consultant and development partner, and played a role in helping get the first prototype off the wall and into a handheld format.
Thanks to manufacturing shortages and global supply chain issues, Raspberry Pis were nearly impossible to get at the time. I happened to have a Pi 4 inside of a smart mirror that I recently built. The mirror has a camera inside of it which I use for facial recognition, so it made for a perfect stand-in until I was able to get better hardware later.
I was able to get the first end-to-end capture and generation flow up and running within a few days using Dall-E using the image variation API endpoint. OpenAI only allows access to Dall-E Gen 1 through their API (it may be Gen 2 now) and and doesn't allow any text prompts to guide the image variation output, so the quality of the images left something to be desired... but the proof-of-concept worked, and I knew I was able to start taking the project more seriously.
The software is only half of the story, as of course the camera needs a body. The seemingly easiest thing to do was to take a real Polaroid, gut it, and cram all of the new digital components inside... which for the prototype is exactly what I did.
I purchased a 1970s Polaroid OneStep off of Ebay, found some YouTube repair videos showing how to disassemble the camera without breaking it, and got to work taking it apart. Once I was left with an empty shell, I took a good look at what we had and then realized that it wasn't going to work at all.
The printer that we were using loads film cartridges from the bottom. The Polaroid, however, loads film from the front through a flap that folds down. We thought that we might be able to just slide the printer in out of the flap, but it was too tall. There was also the issue of mounting the Raspberry Pi and camera module, which wasn't as easy as simply fixing to the insides. These cameras are small and offer little room to work with, so the components simply wouldn't fit. It was clear that we had to be more tactical with our approach and create some custom components. We'd have to 3D print
*Queue three months of designing and printing mounting components montage*
I'm going to skip over a lot of the trail and error of learning to design and 3D print components to mount our components into the original OneStep body and just give you the juicy details, but you can see the "V1" body we built in this video. In the end, we only kept the original face of the OneStep and created a custom base plate to hold all of our goodies. This let us mount the printer, Pi, and camera, as well as install a shutter button and LED status light. On the bottom of the base plate was a hinged door which let us load in film. This door was held closed by a screw, so you needed to carry a screwdriver with you if you were out shooting.
This was a sub-par solution which is a little embarrassing to look at - but it worked. While it doesn't look very good, it served as a great learning experience for designing and printing custom hardware, and set the stage for me to be able to design the fully cusom body for the final build.
In the early prototypes, every camera processed its own jobs locallyIt worked, but it drained the battery fast and made the hardware work way harder than it should. I built the Visionairy Media Processing server to take that weight off the cameras. Now the server handles all the job management and runs the different processing pipelines, which keeps the cameras light, fast, and battery-friendly.
It all begins when a camera captures something new and submits a ticket to our Visionairy Media Processing server. That ticket is a tiny instruction file with everything the system needs to know: who the user is, what media just arrived, what style they selected, and any custom settings. Think of it like a job jacket in a print shop — a clear set of directions that follows the file through the whole pipeline.
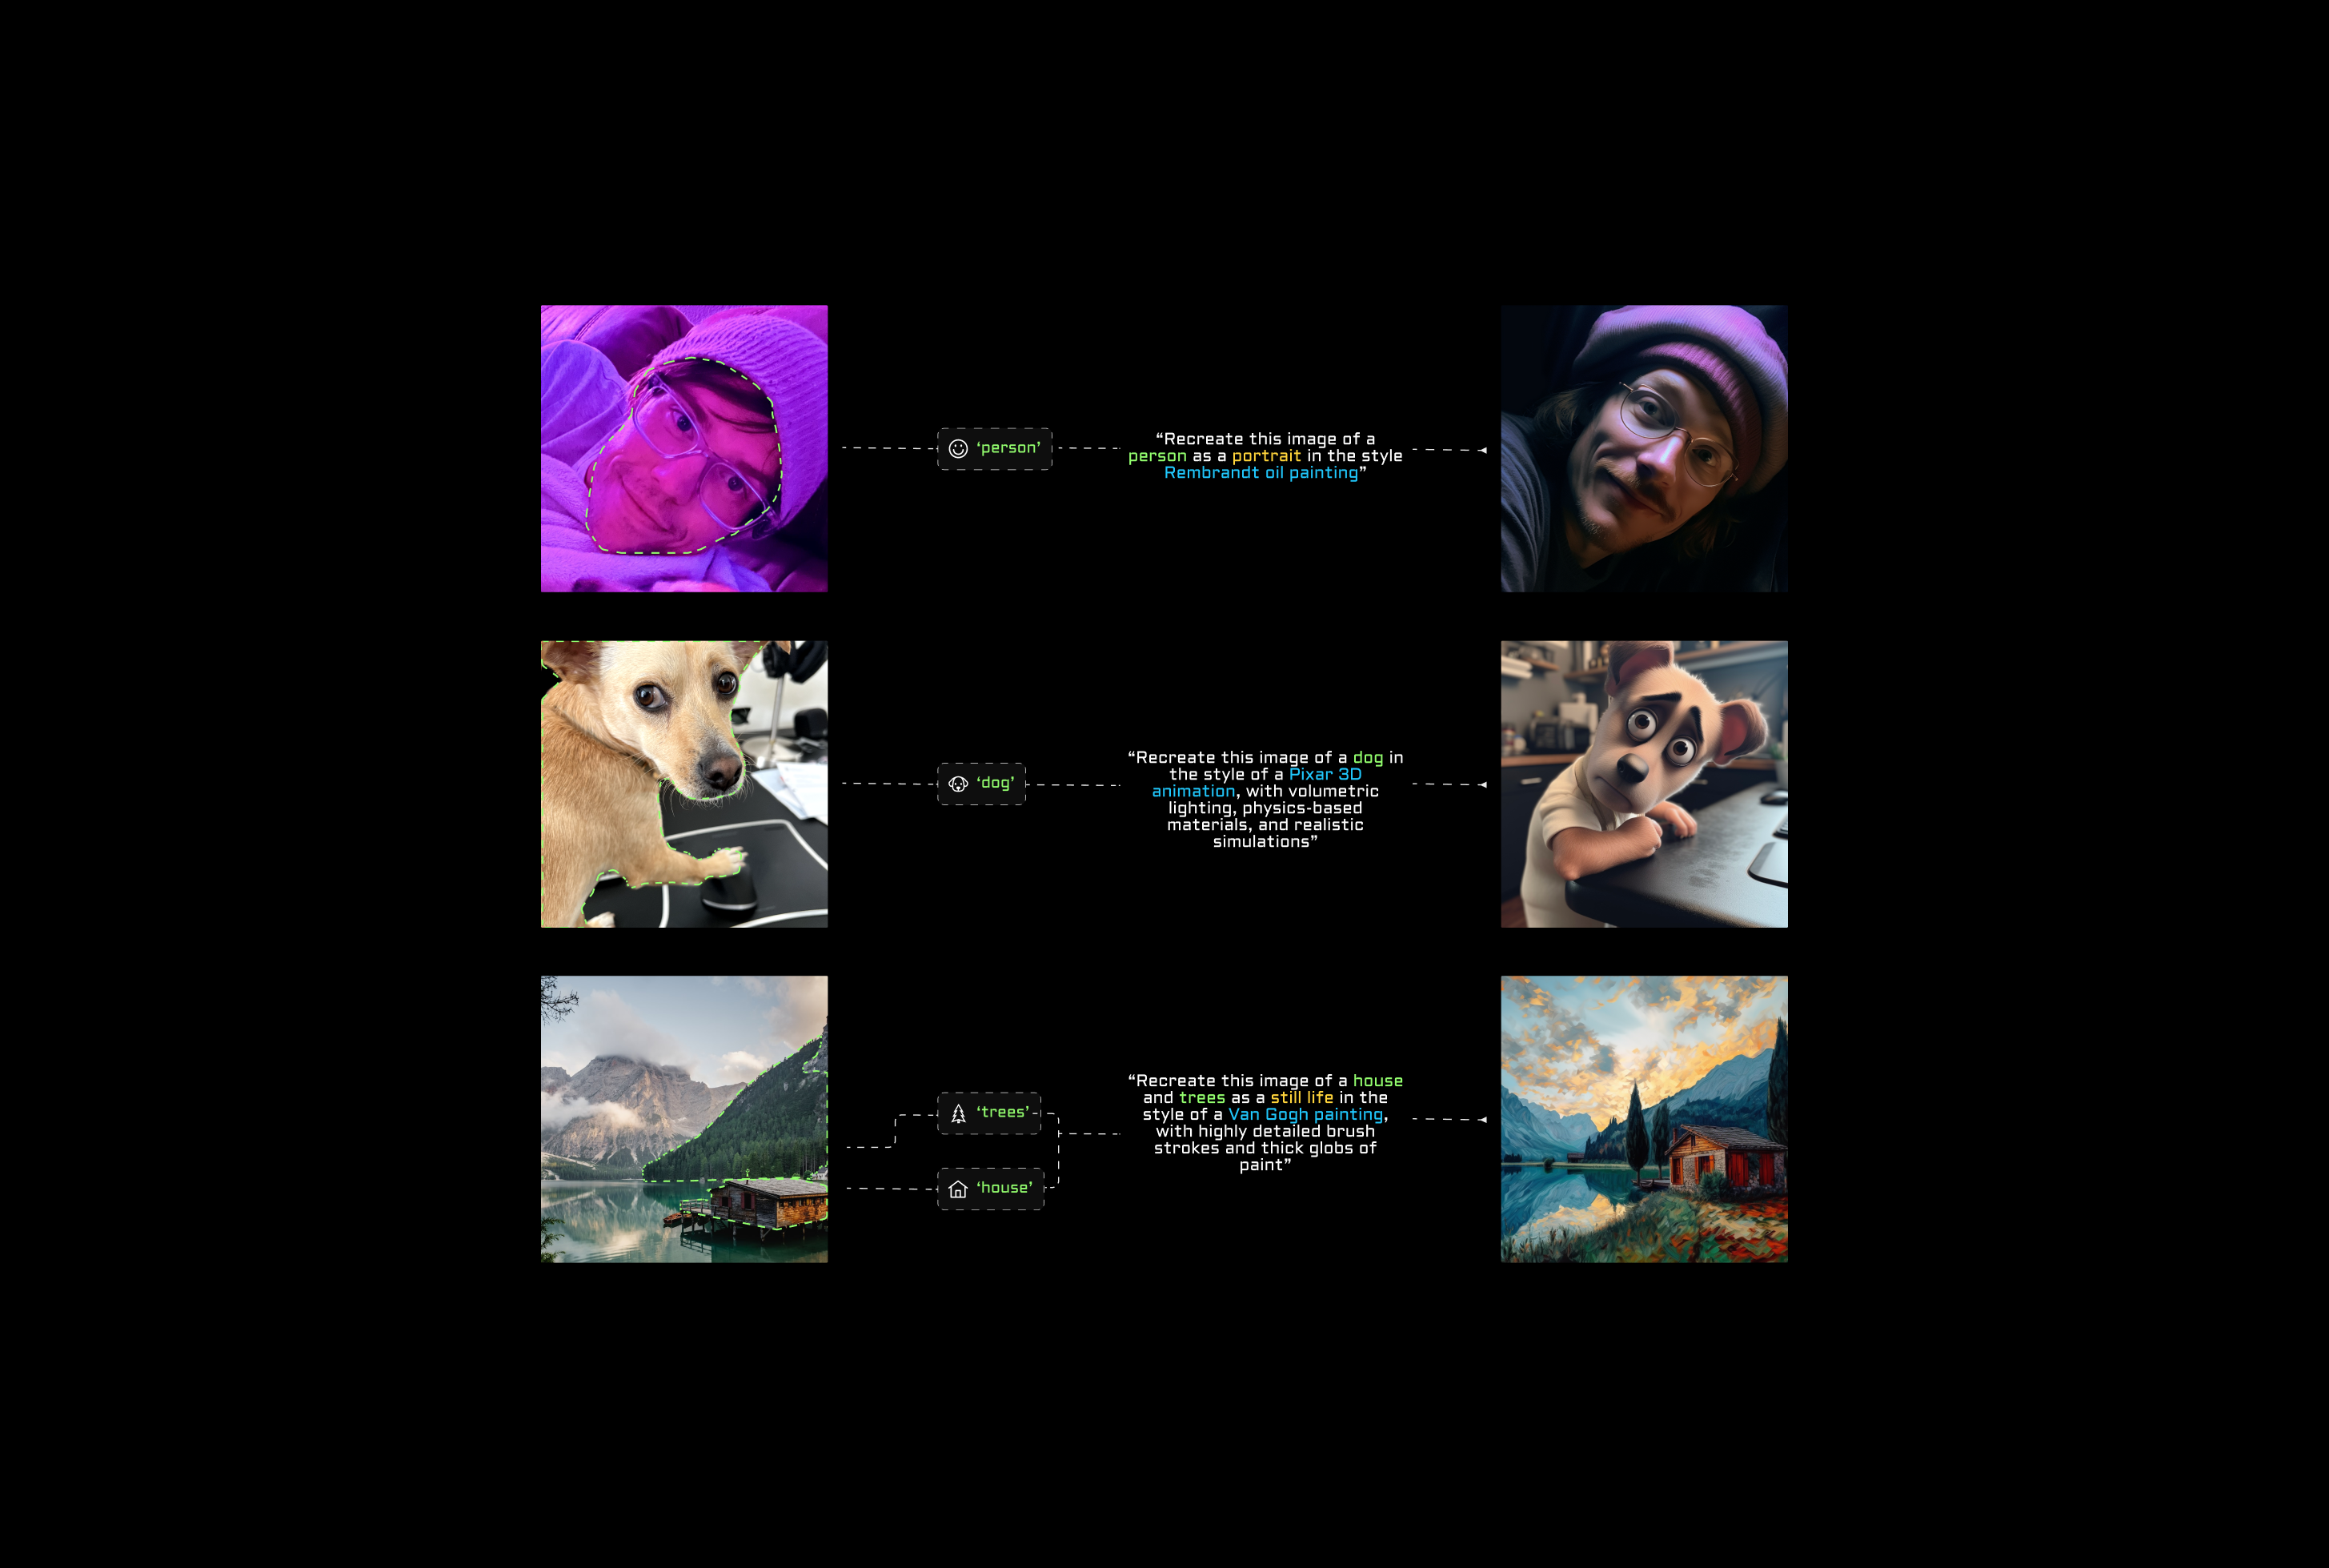
Every photo or video that comes through first makes a quick pit stop with my Classifier System. This is a custom service built on top of OpenAI’s vision models that looks at the media and answers three questions:
1. What kind of shot is this? (portrait, landscape, still life, street photography, etc.)
2. Is there a person present, and if so, what’s their basic appearance
3. How can we describe the scene in a simple sentence?
That little JSON response is more powerful than it looks. It’s the routing signal for everything that happens next. If the classifier says “portrait,” the system knows to spin up a pipeline tuned for faces and human details. If it’s “illustration” or “glamour shot,” it heads down a completely different track that uses models better at stylization, textures, or cinematic lighting. Landscapes, still lifes, and street shots all have their own specialized toolchains too. This portion of the system is modular and easily scaled, as it's easy to add new classifications any time.
This routing method means Instagen isn’t just throwing the same filter at every photo, it’s choosing the right model for the right moment, automatically. By classifying first and then picking the pipeline, we’re able to push each image into the environment where it can shine, whether that’s a delicately inked illustration, a glossy fashion edit, or a moody cinematic frame.
Once the media is in the right lane, our processing service takes over — running the job from start to finish, saving the output, and attaching all the metadata that tells the story of how it was made. As soon as a result is ready, the server notifies the camera and real-time status updates flow back down the wire, so the little screen on top of the camera always shows exactly where things stand: queued, running, or complete.
From capture to finished piece, it’s a fully automated relay race — tickets, classification, processing, and delivery — designed to make sure your images always come out looking their best without you having to lift a finger.
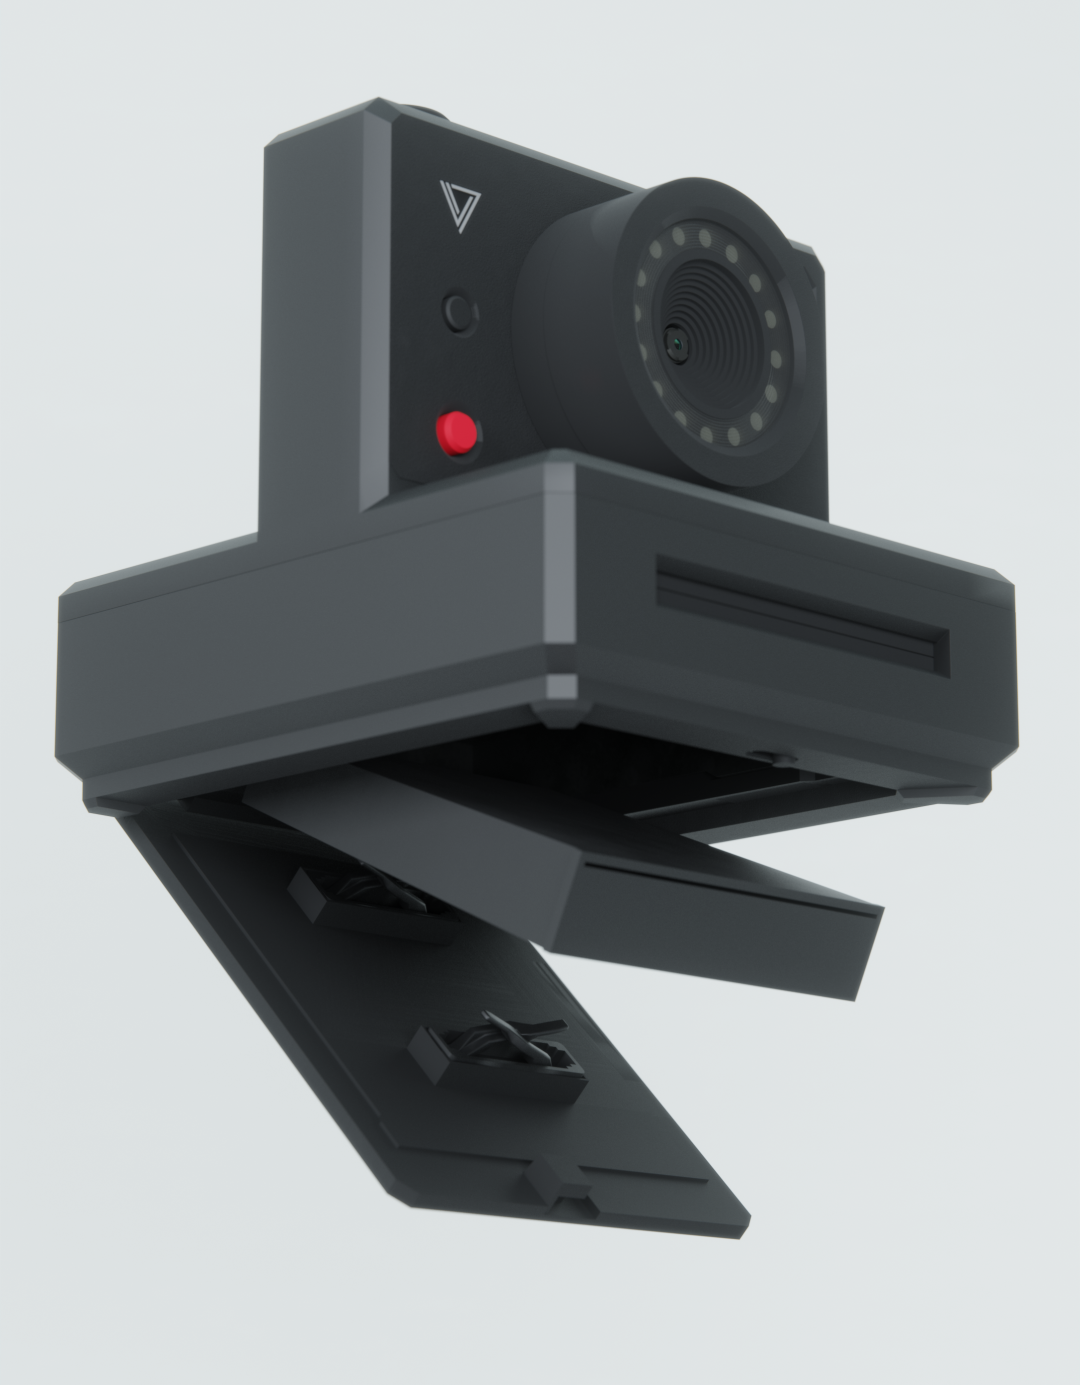
Instagen is an Instant Camera reminiscent of popular models from the 1970s. From its bold silhouette to its built-in printer, Instagen is designed to turn heads and print memories.
Nowadays the majority of our media are digital. Flat, non-physical artifacts of memories at constant risk of being forgotten or deleted. Pictures meant more when you had limited captures and had to endure an entire post-processing stage to get them. instagen captures are intentional, fun, and tangible
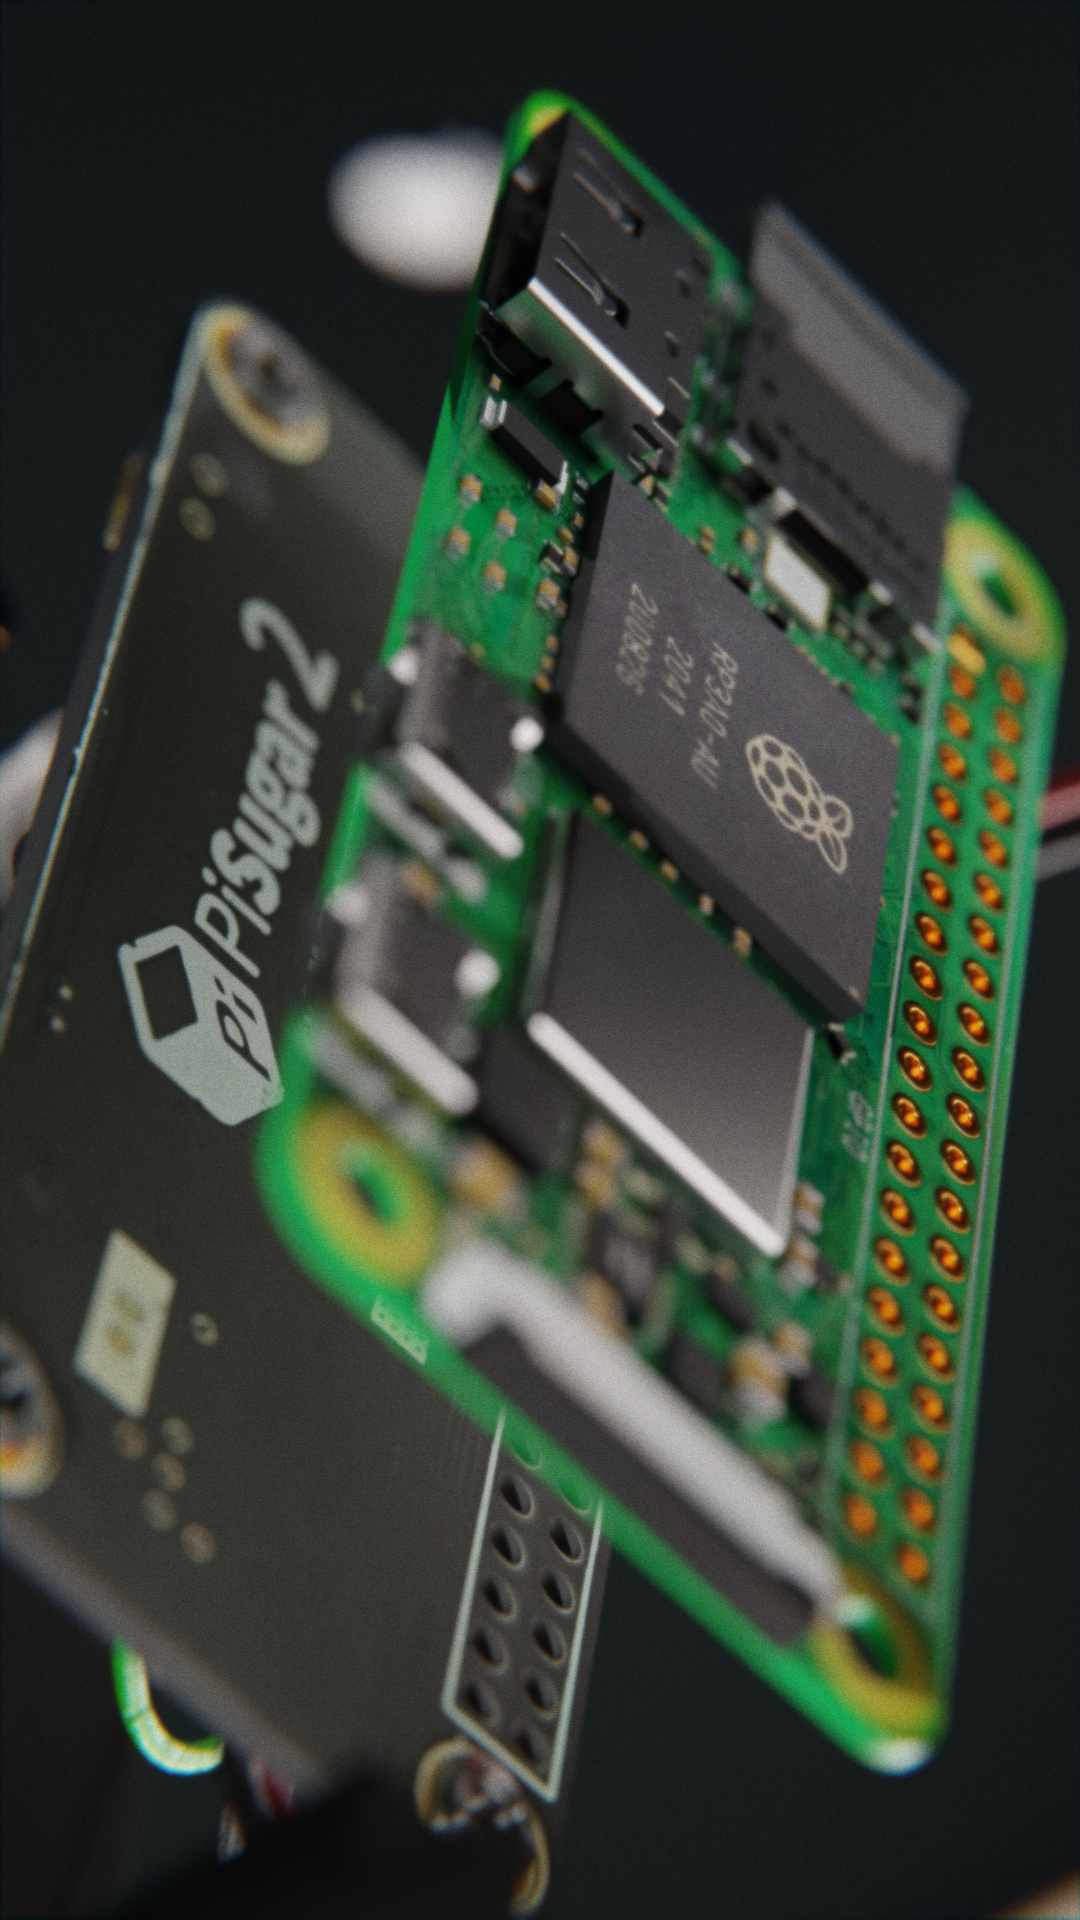
The brains behind the operation is a Raspberry Pi Zero W 2. This little computer which is smaller than a credit card packs 512MB SDRAM with Wi-Fi and Bluetooth capabilities. Since all image processing is handled off-device, it's the perfect balance of size and speed.
Powering the Pi is a nifty little power management hat manufactured by PiSugar. This board allows the camera to run on battery power and hosts the on/off power switch along with a sleep/wake button, making it easily portable and super convenient to power the camera on and off.
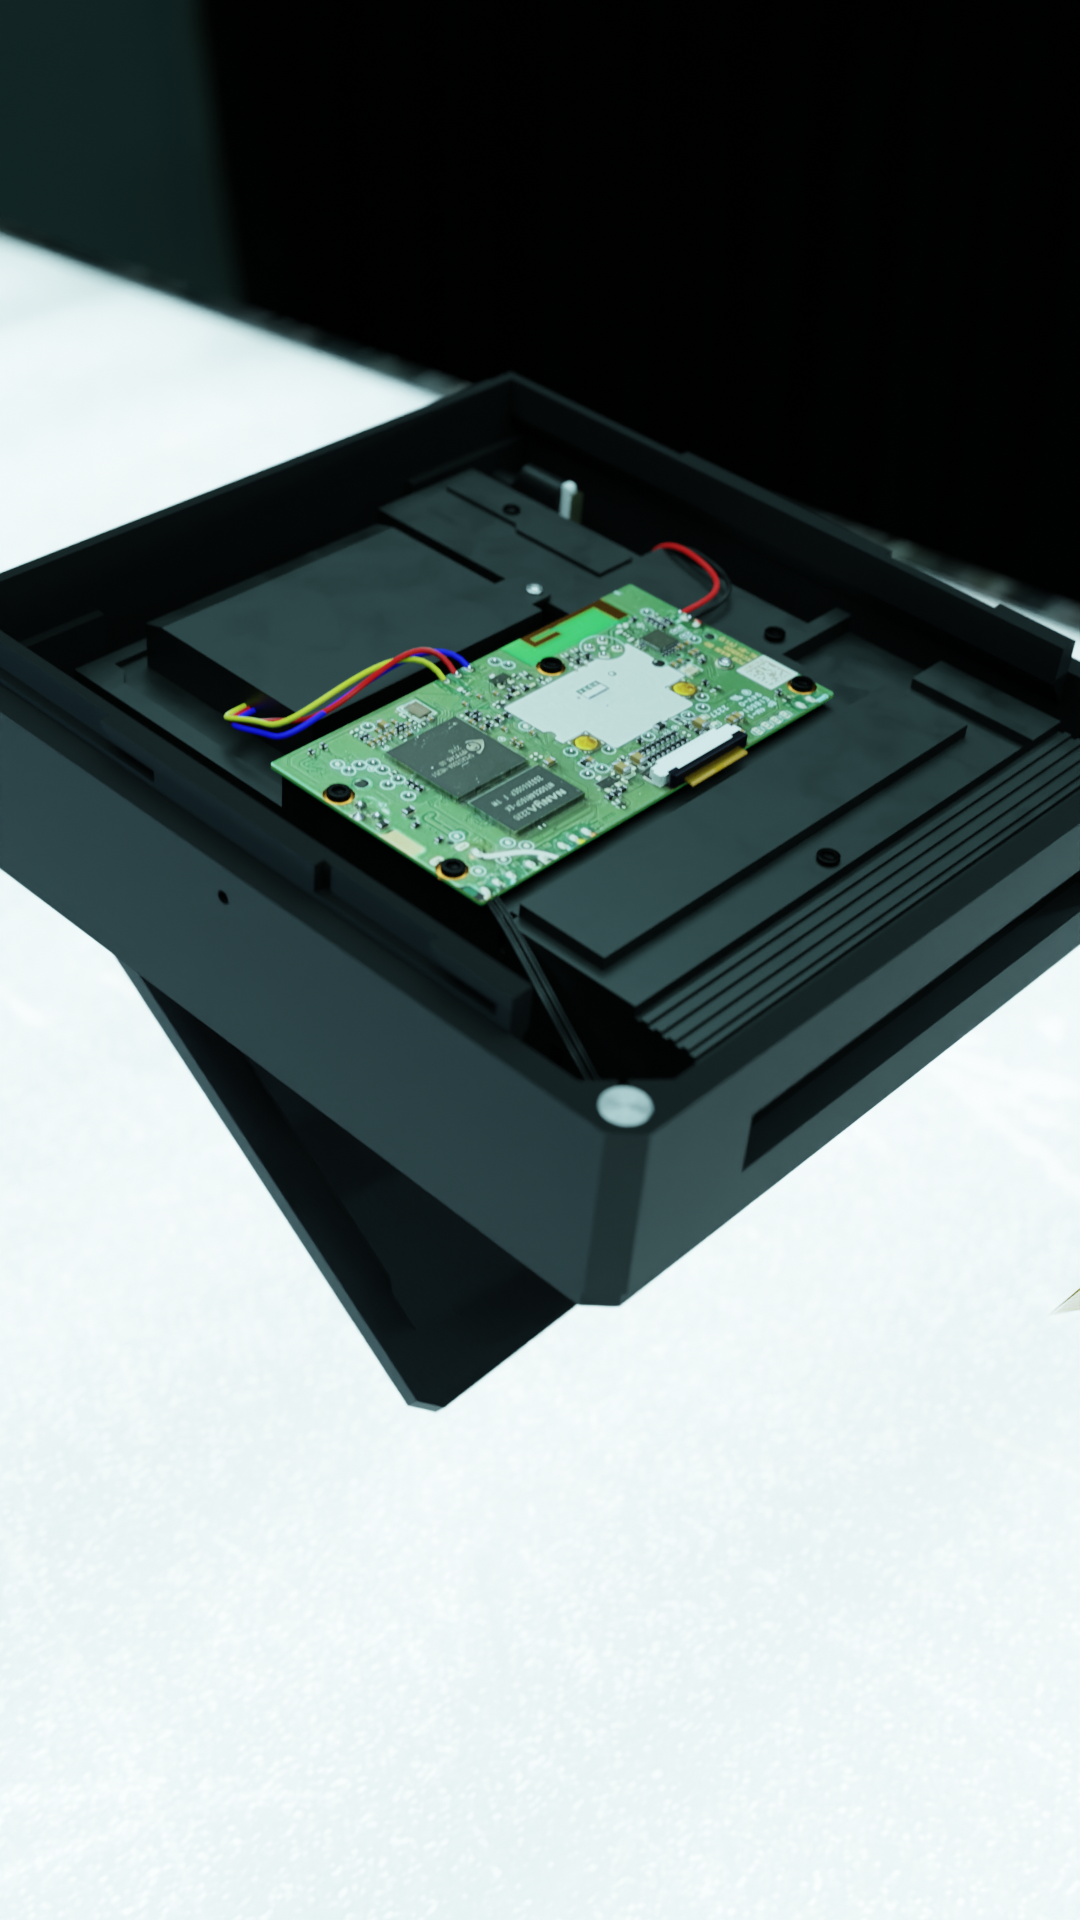
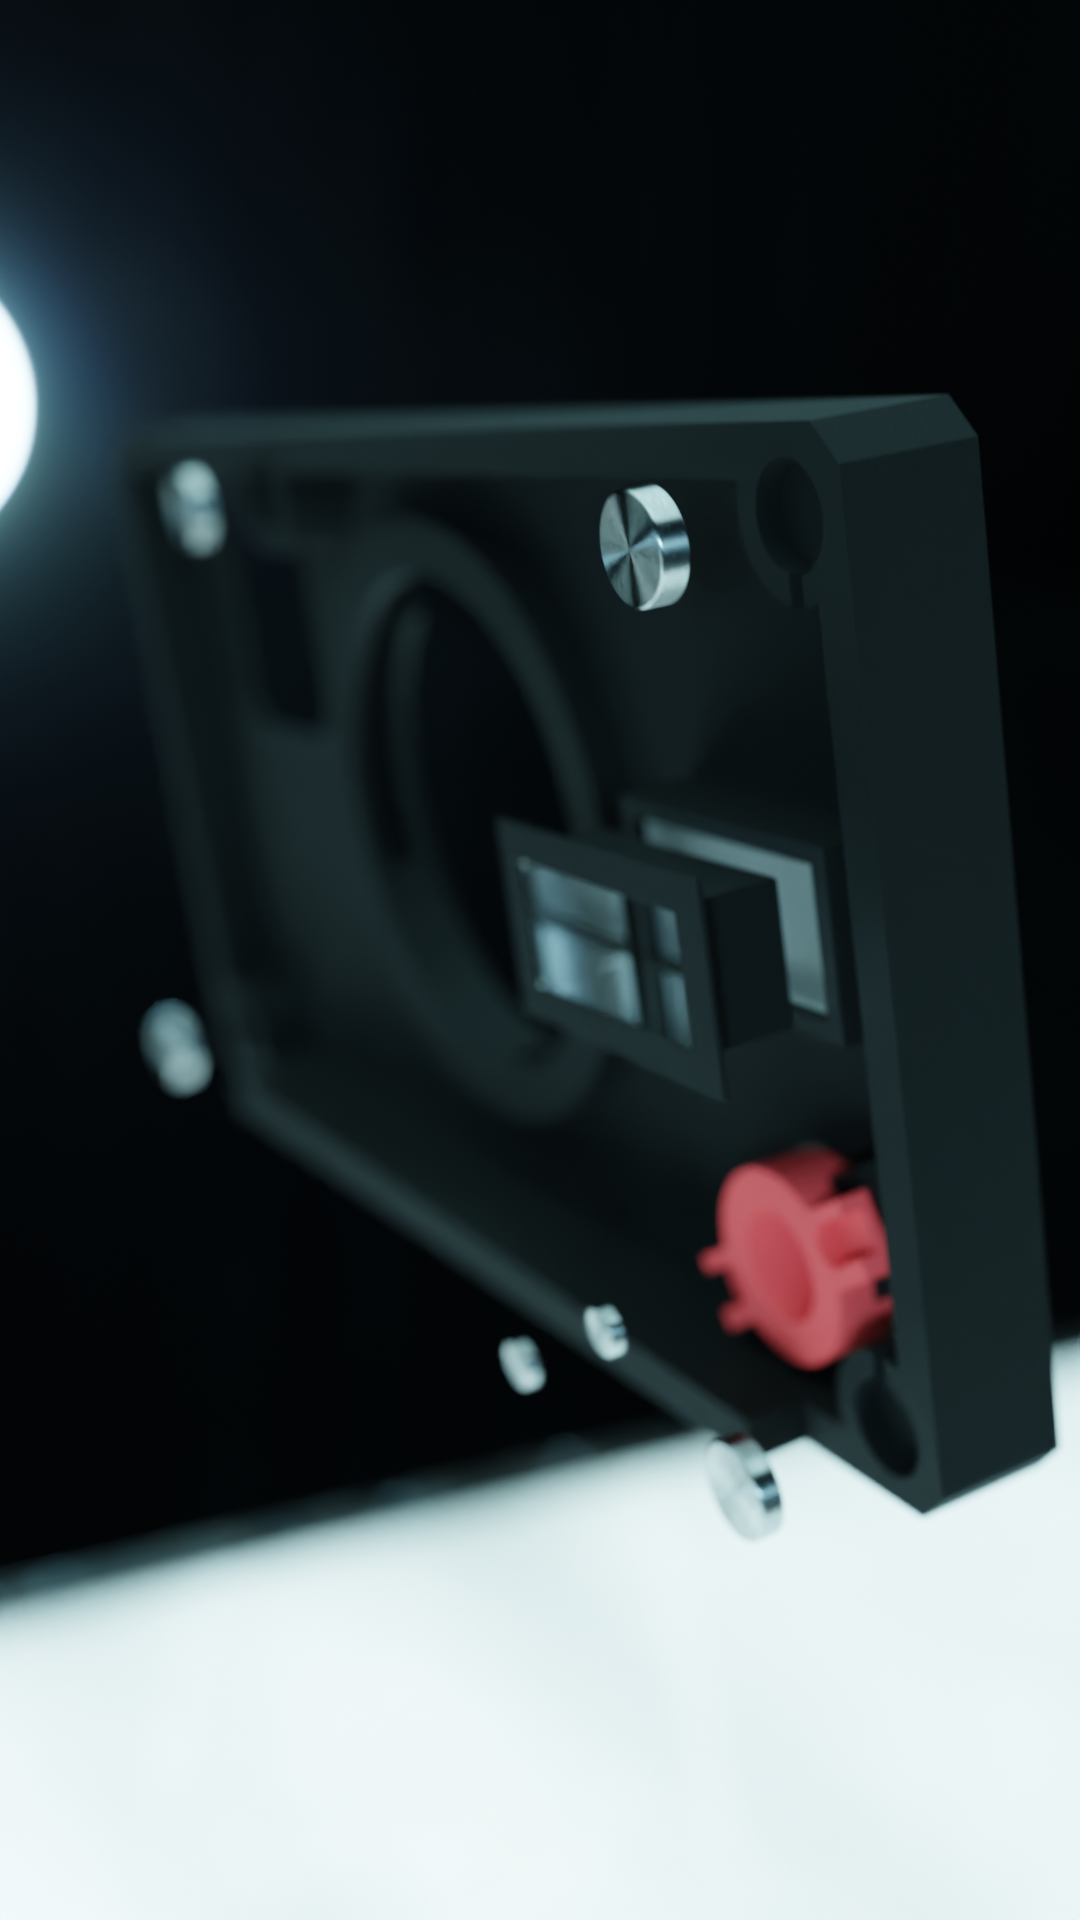
The pièce de résistance of the build and by far the most challenging part to design for. Nothing good comes easy! Not only did this require a special chassis to mount onto, which was full of weird little details from the manufacturer, it also required us to build a hinged door to load the film cartidges through. This door also contains spring-loaded arms to apply strong pressure to the film cartridge as well as a locking mechanism which intfaces with special 'open-close' sensor attached to the printer.
The software to incorporate this printer into the system was developed by a developer in the Netherlands and was implemented by Mike Manh, who I mentioned earlier. Mike developed a beautiful solution to manage the complex Bluetooth handshake that takes place between the Pi and printer on startup, and worked to improve the packet transfer speed between the two devices to reduce print time. Without these two, Instagen would be mothing more than a what should have been a mobile app made more complicaded and shoved in a plastic box.
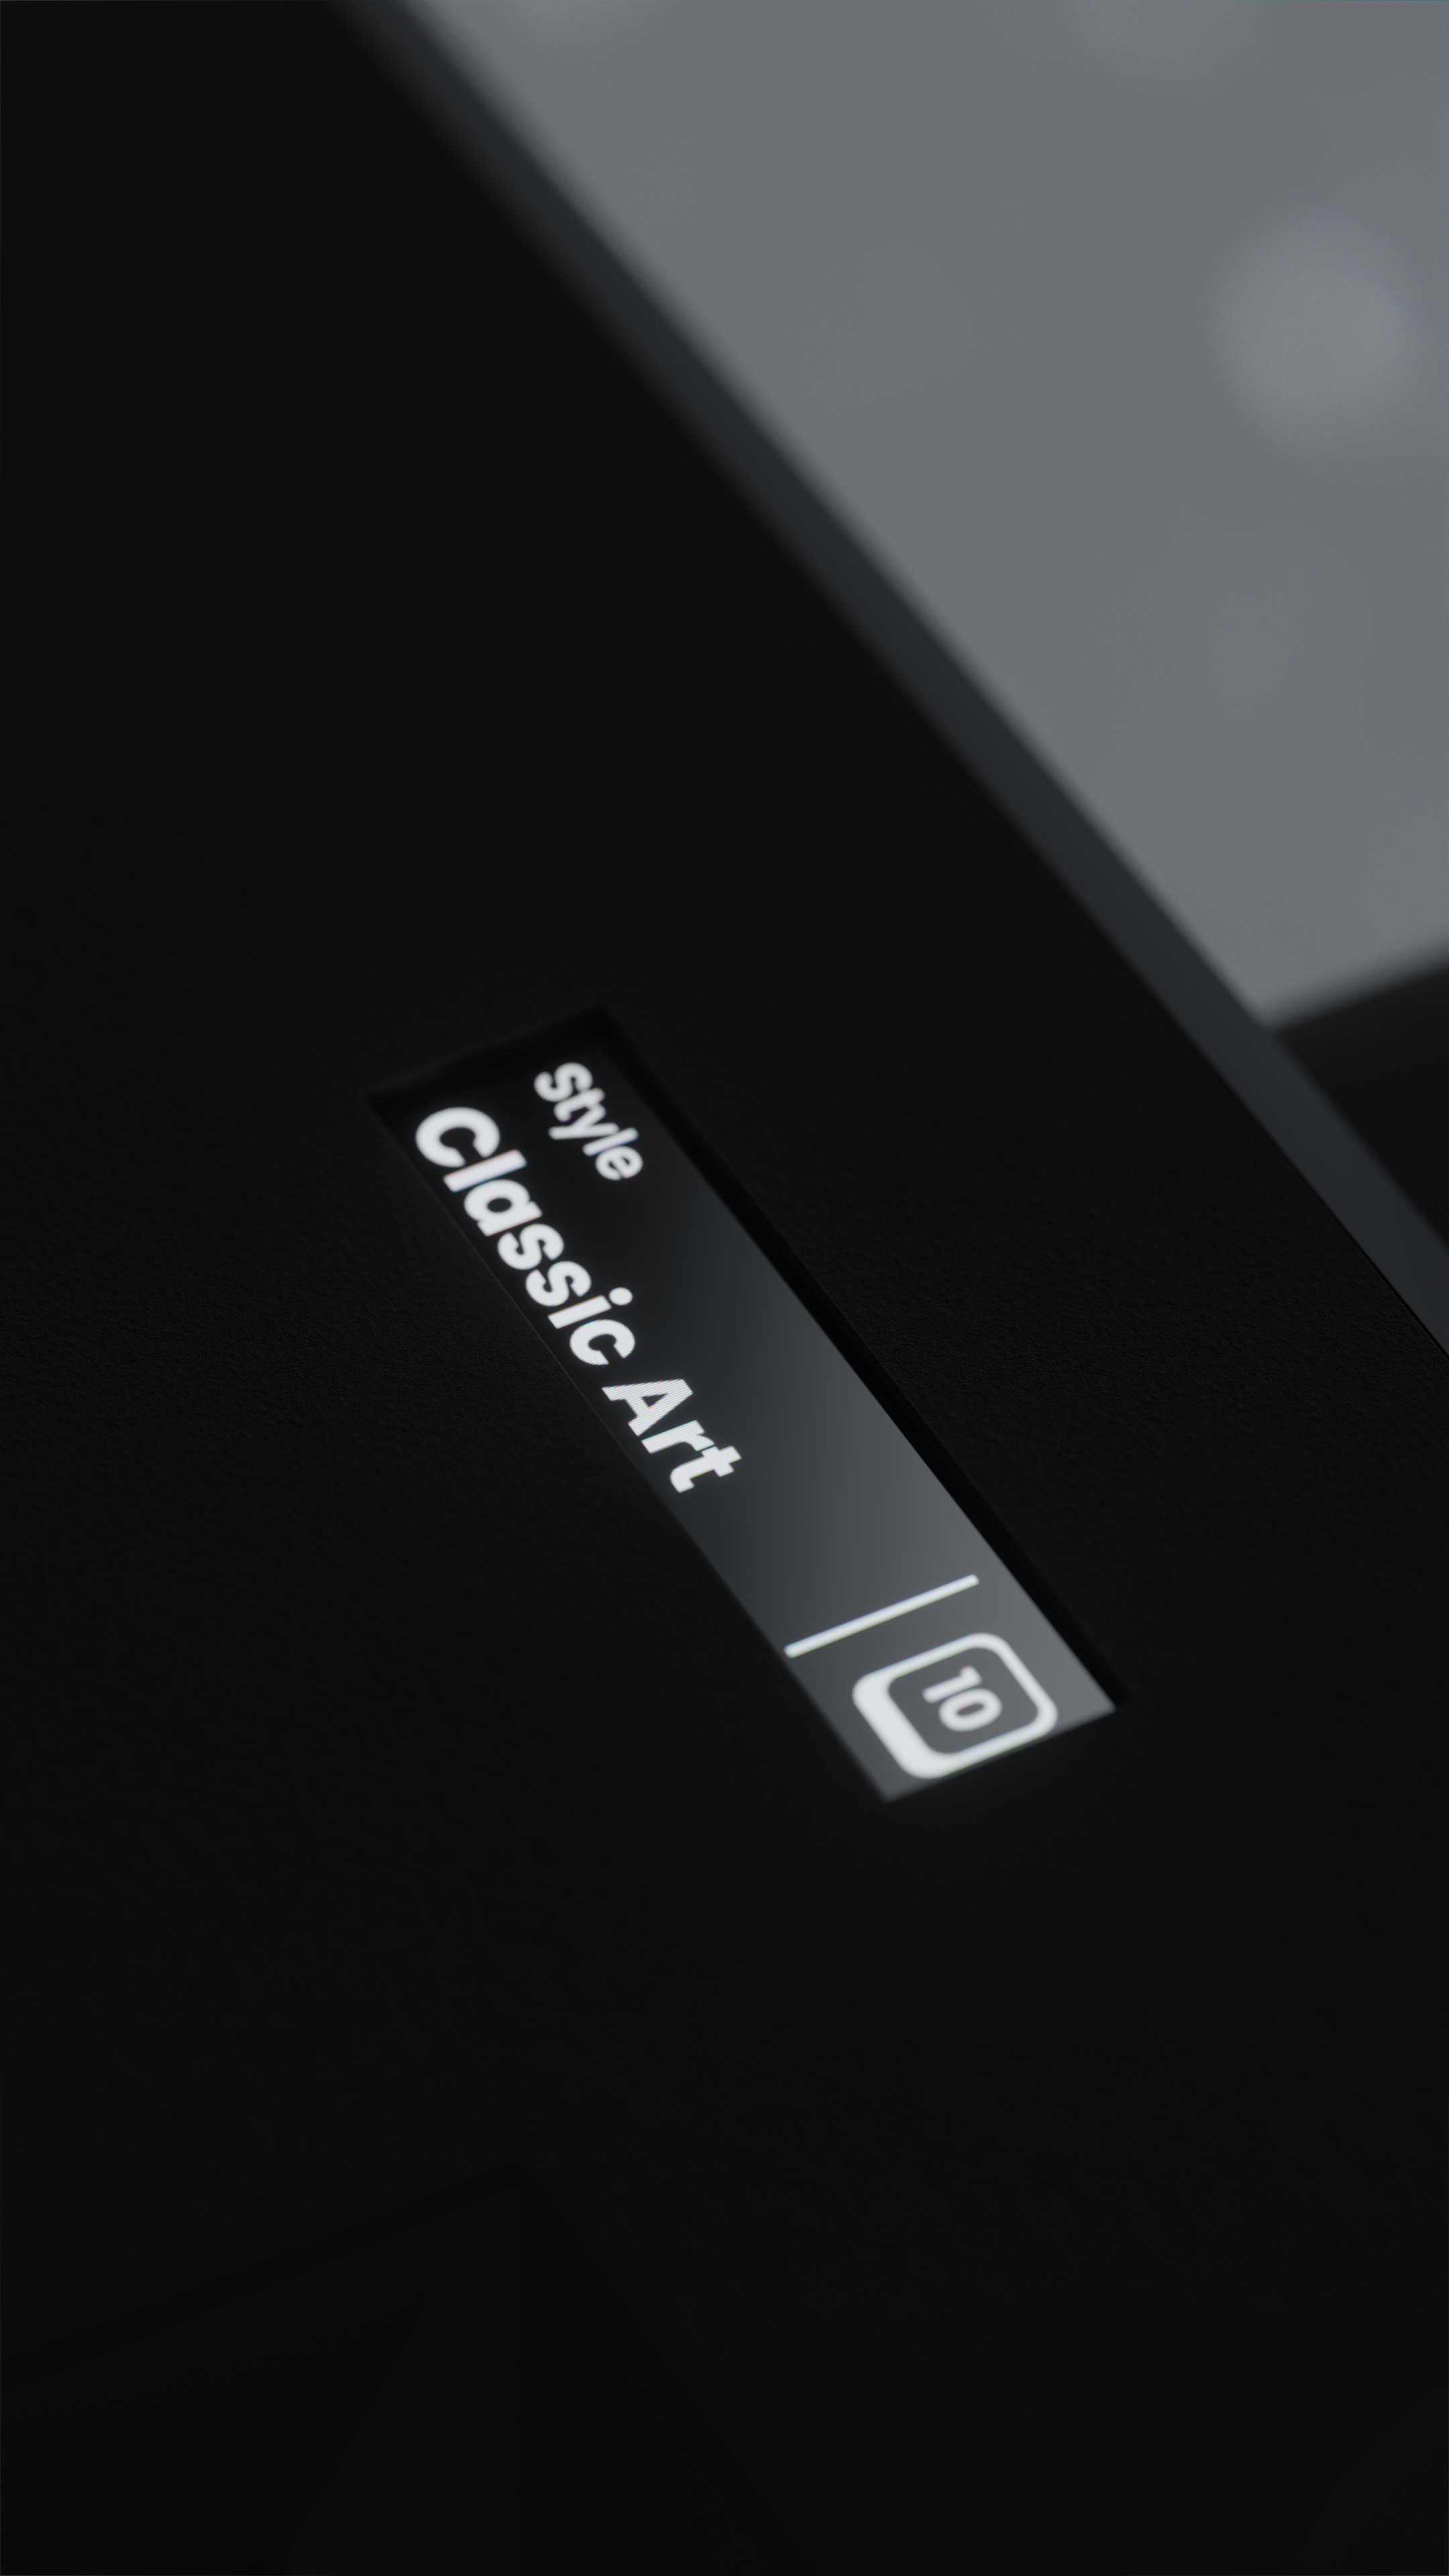
Sitting neatly on top of the camera, the Instagen’s OLED screen keeps you in the loop without getting in the way. It’s your quick-glance guide for choosing styles, checking how many prints you’ve got left, and seeing live status updates while the camera powers on or processes a shot.
Designed to be simple and glanceable, the display adds just enough feedback to make the Instagen feel alive — like a little heartbeat that lets you know your next capture is on the way.

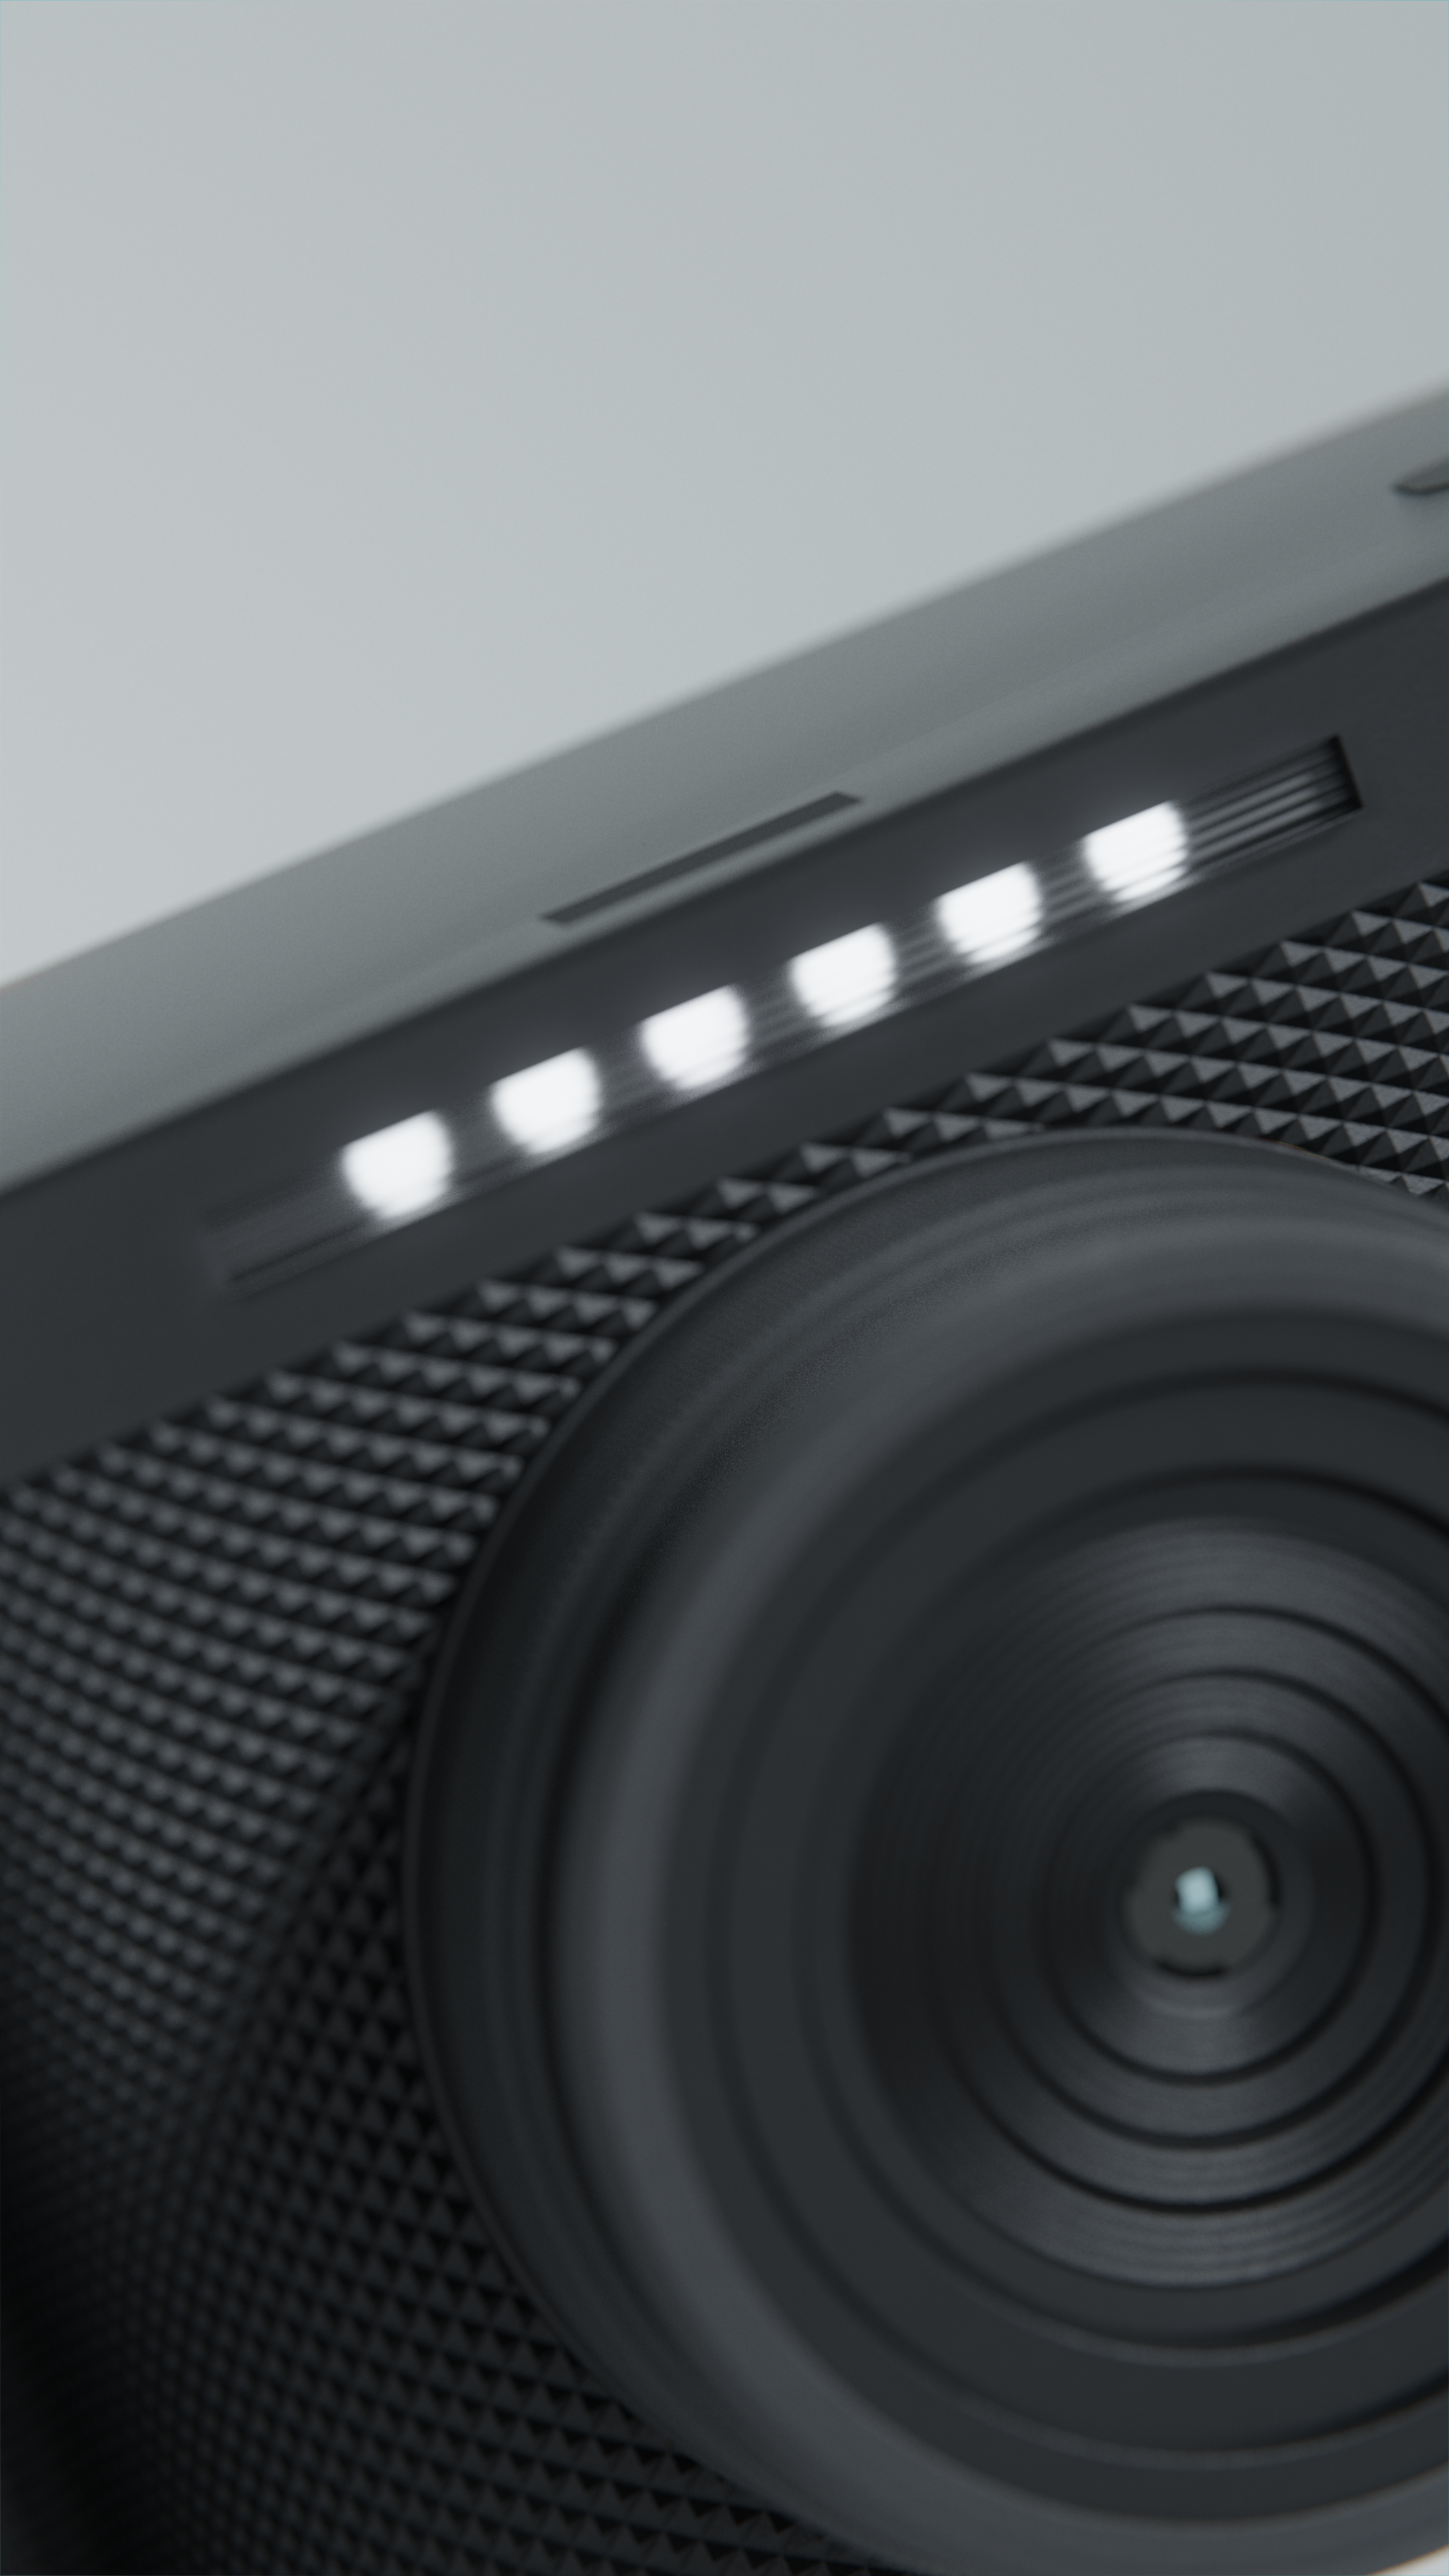
The lens is composed of multiple parts which house the camera module, lens glass, and LED ring. Sandwitched and locked together, the entire lens piece locks into the faceplate, also alowing for easily swappable designs.
The LED ring is used as both a ring light flash, pre-flash indicator, processing status indicator, and print status indicator. It's a fun, somewhat mesmerizign way to clearly indiacate what the camera is doing and add some visual flare.
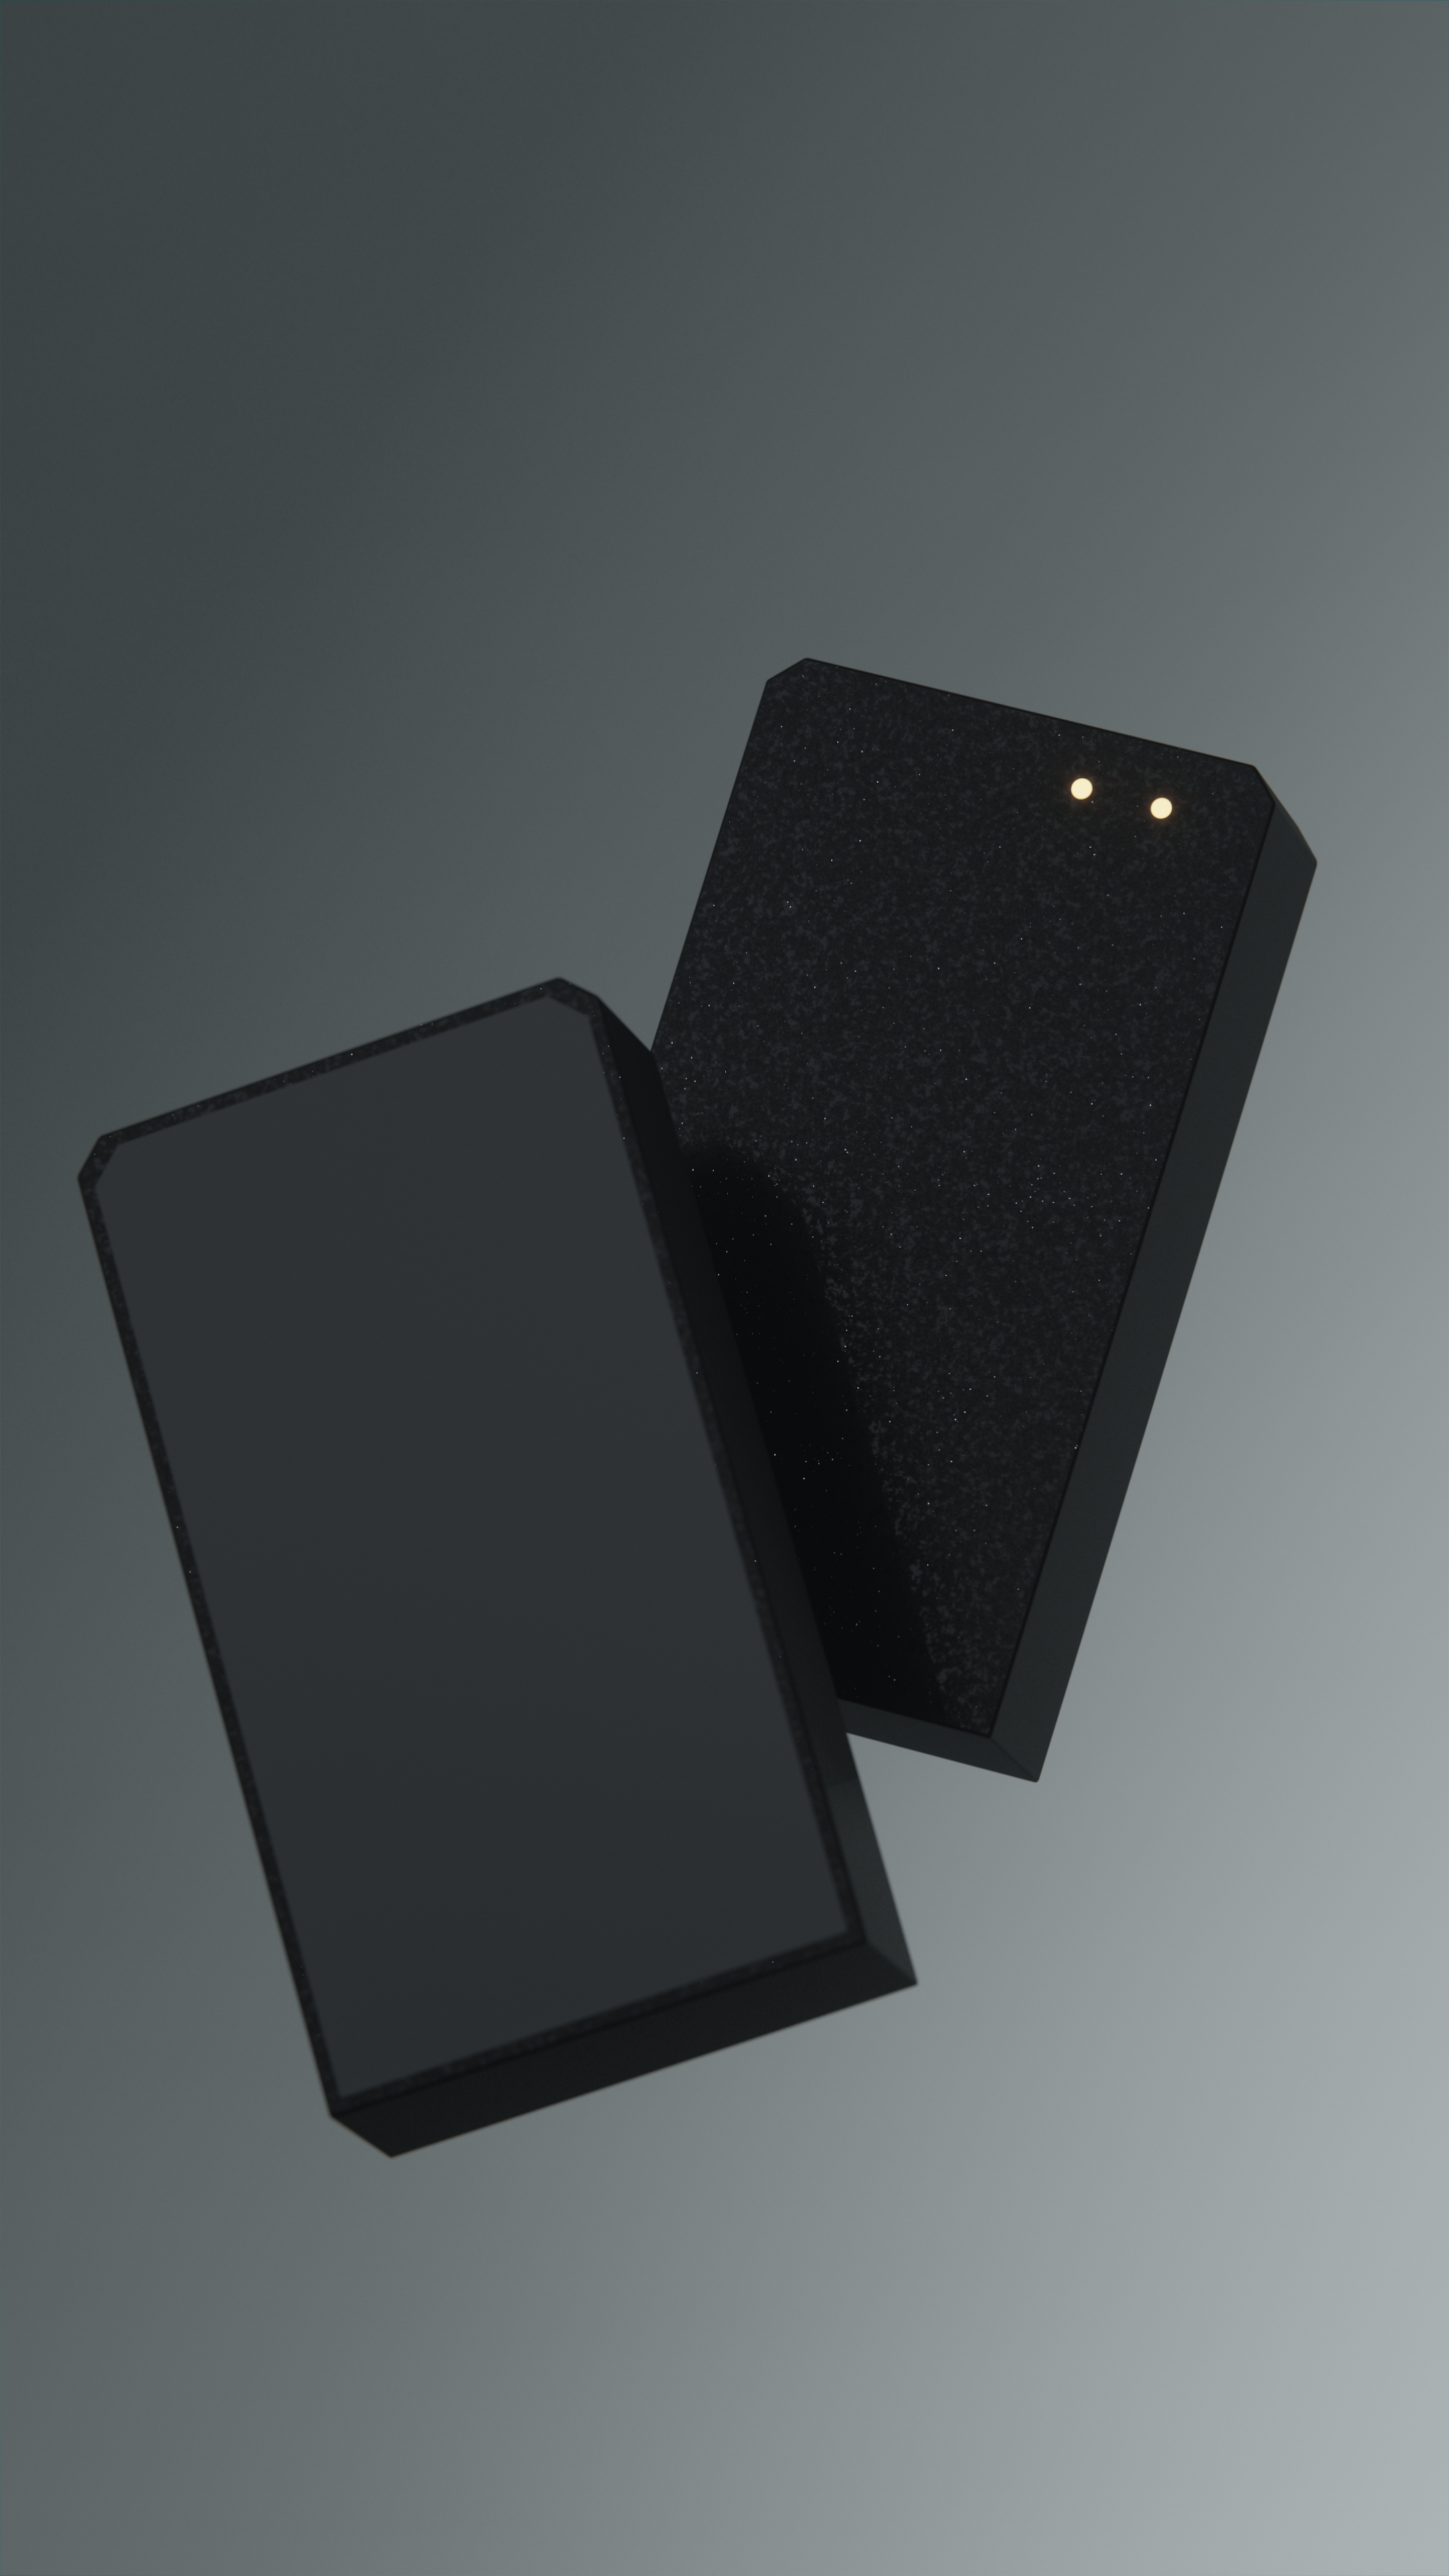
Isn’t it the worst when you run out of juice? Never miss a capture with Instagen’s swappable batteries! Each pack is designed to slide in and out with ease, so you can carry spares and keep shooting without waiting on a recharge.
The custom battery modules were built specifically for Instagen, giving the camera a longer lifespan and a more reliable power system. Whether you’re out on an all-day adventure or just forgot to top up before heading out, swapping in a fresh pack takes only seconds. It keeps Instagen feeling like a real camera - always ready to capture the moment, no power anxiety required.
Magnets are cool as hell, so I was happy to find ways to usefully integrate them into Instagen's design. The push button I used for the shutter was a bit prone to sticking, so some opposing magnets were embeded into the button and the component mount behind it to force the button out after pressing.
The door latch also uses a similar setup to ensure the latch doesn't get stuck in the open position, as well as applying additional force on the printer's door sensor to ensure constant closure. Additionally, the faceplate is held on by magnets in each corner, not only allowing for easy access to the internal components (for me) but allows for swappable faces with different designs.
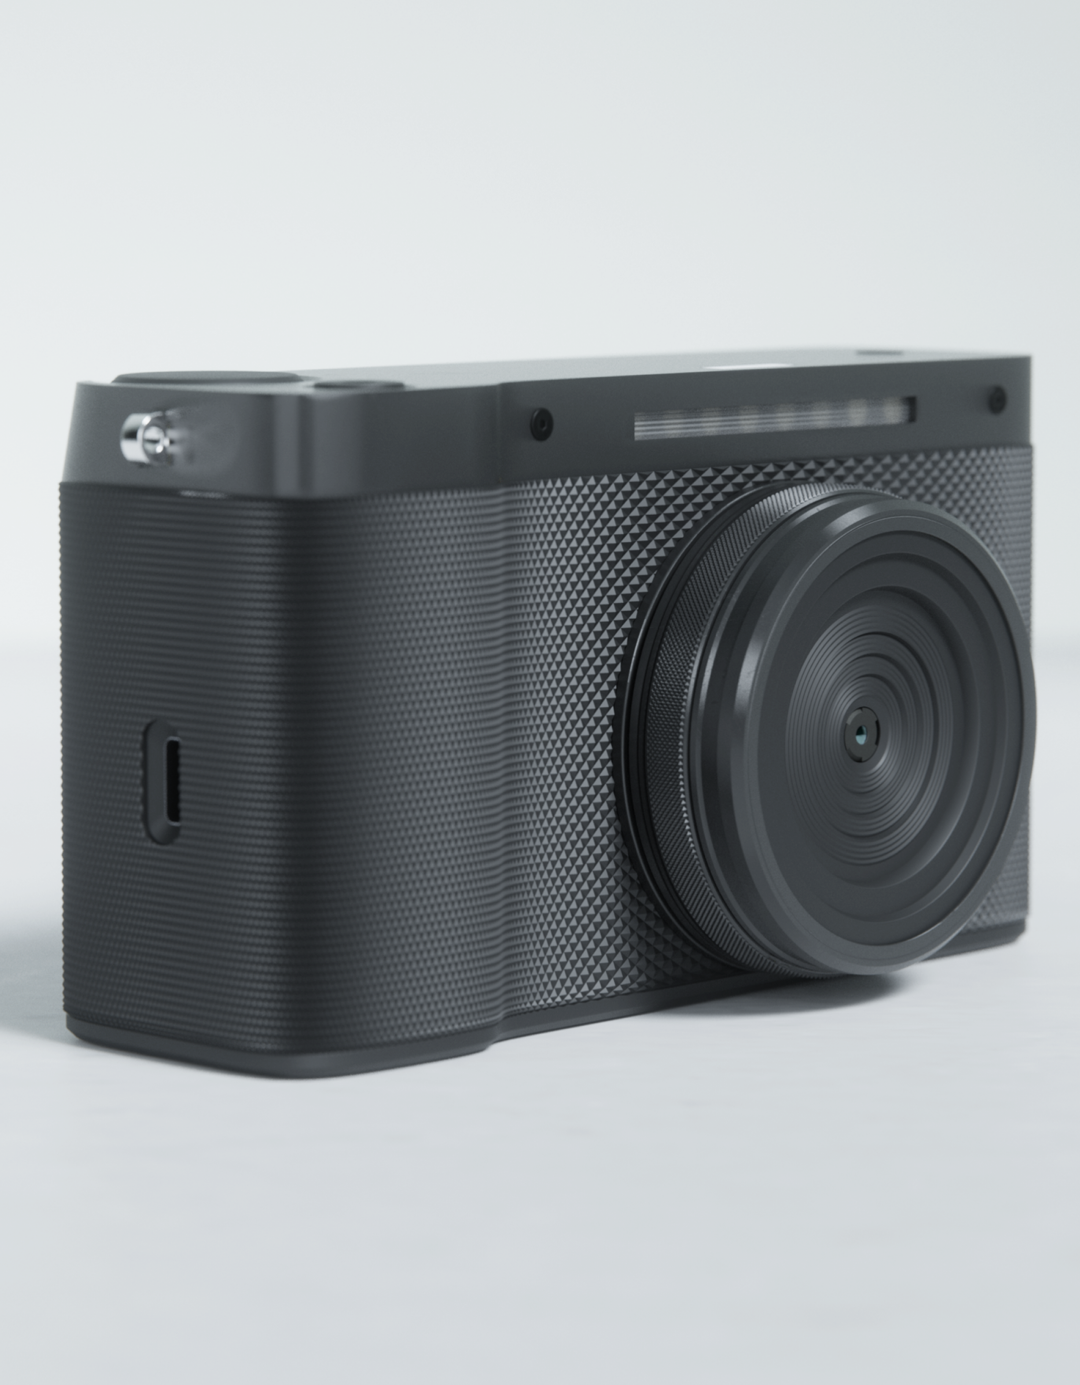
As I was wrapping up development on Instagen, AI video restyling models were quickly improving, and I wanted to explore how they could fit into the creative pipeline I had built. Instagen had proven the magic of blending old-world hardware with new AI capabilities, but it was purpose-built for instant prints. To push further, I needed a new camera designed for capturing both photos and video... something modern, portable, and versatile. That’s what led me to build Luminaire, the second camera in the Visionairy line-up.
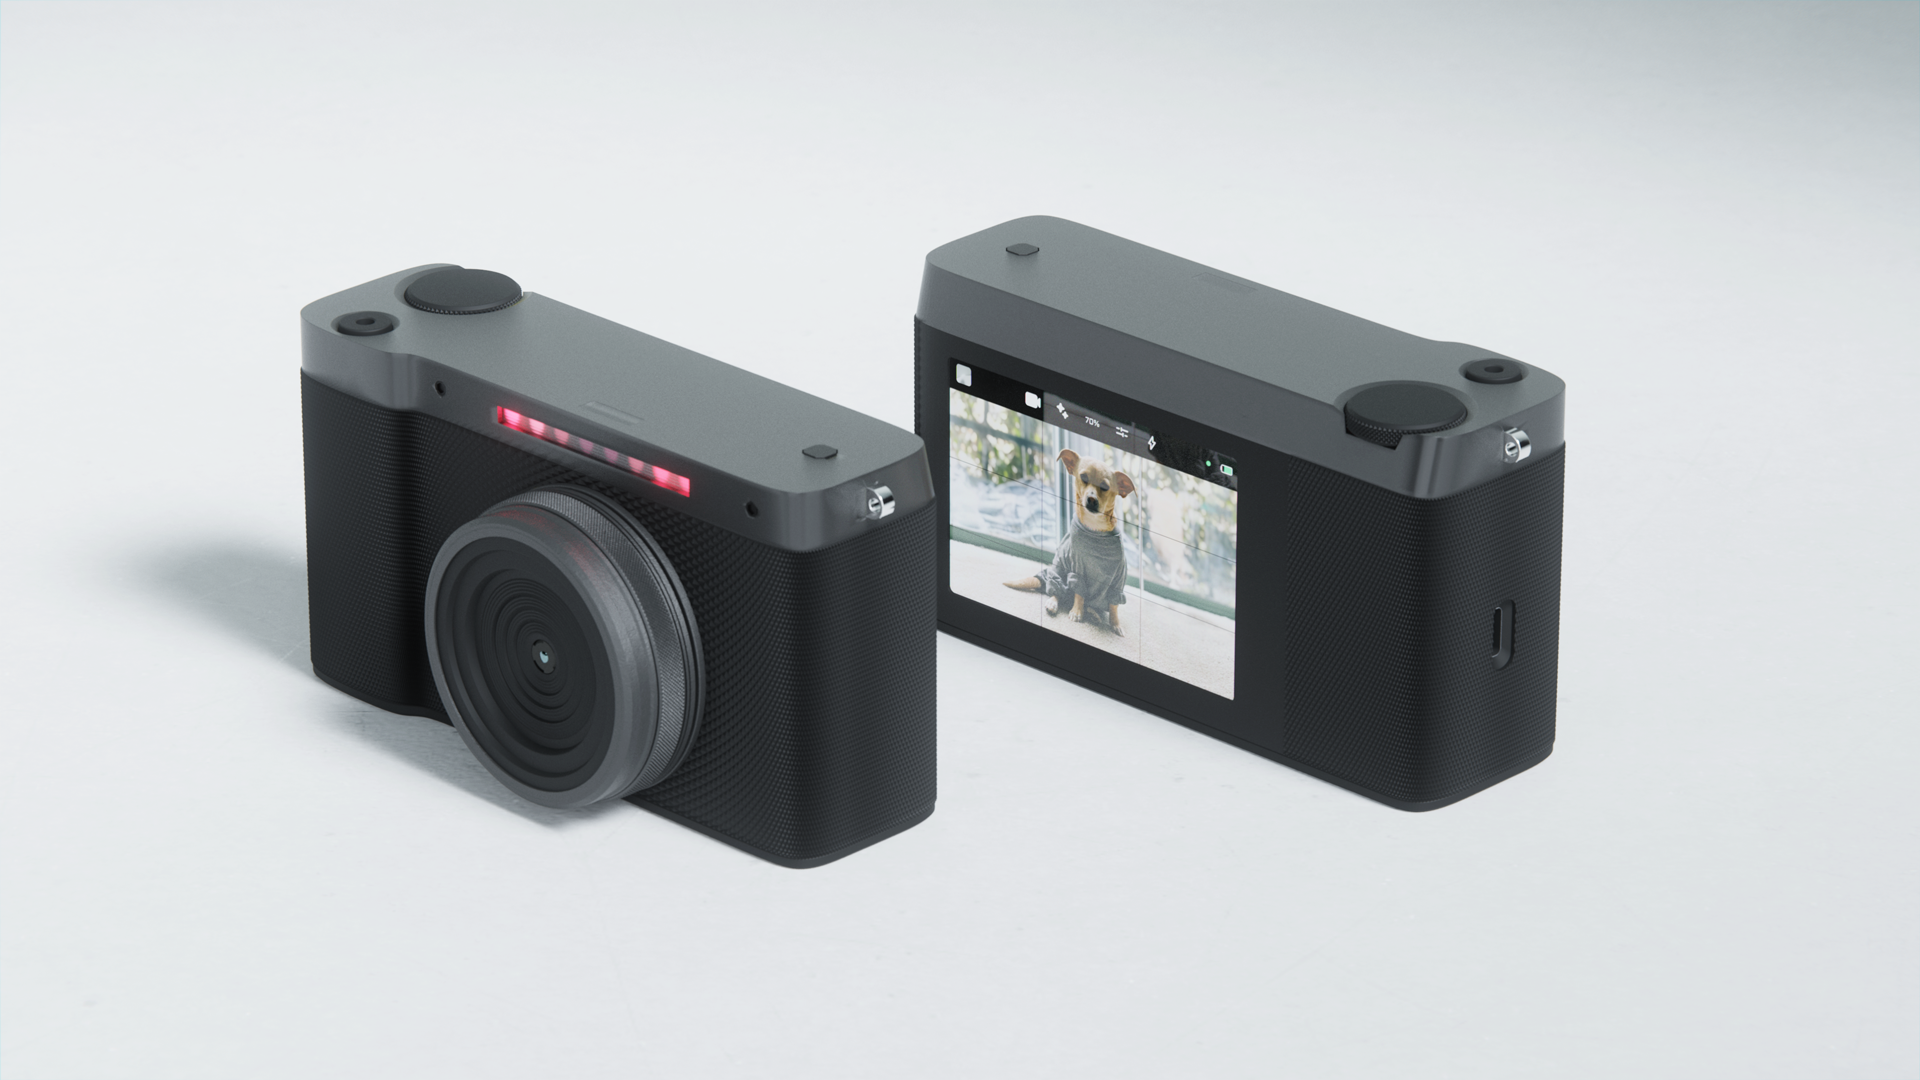
Luminaire was built from the ground up as a digital-first device. It’s small enough to slip into a jacket pocket, with a sleek ergonomic body and a knurled textured grip that makes it feel like a premium tool. Running on my custom Chronos system, it supports HDR capture, manual camera controls, and an onboard media gallery where you can view both originals and AI-generated results. In short, Luminaire represents the next stage of the Visionairy cameras: a portable device that brings the possibilities of AI restyling into everyday photo and video capture.
The device contains a 3.5" capacitive touch screen. It is, admittedly, not a great screen but there are not a lot of good options for screens on RPis and this one is the best out of all of the options! The refresh rate is fast enough to not notice any lag, and the color range is pretty good.
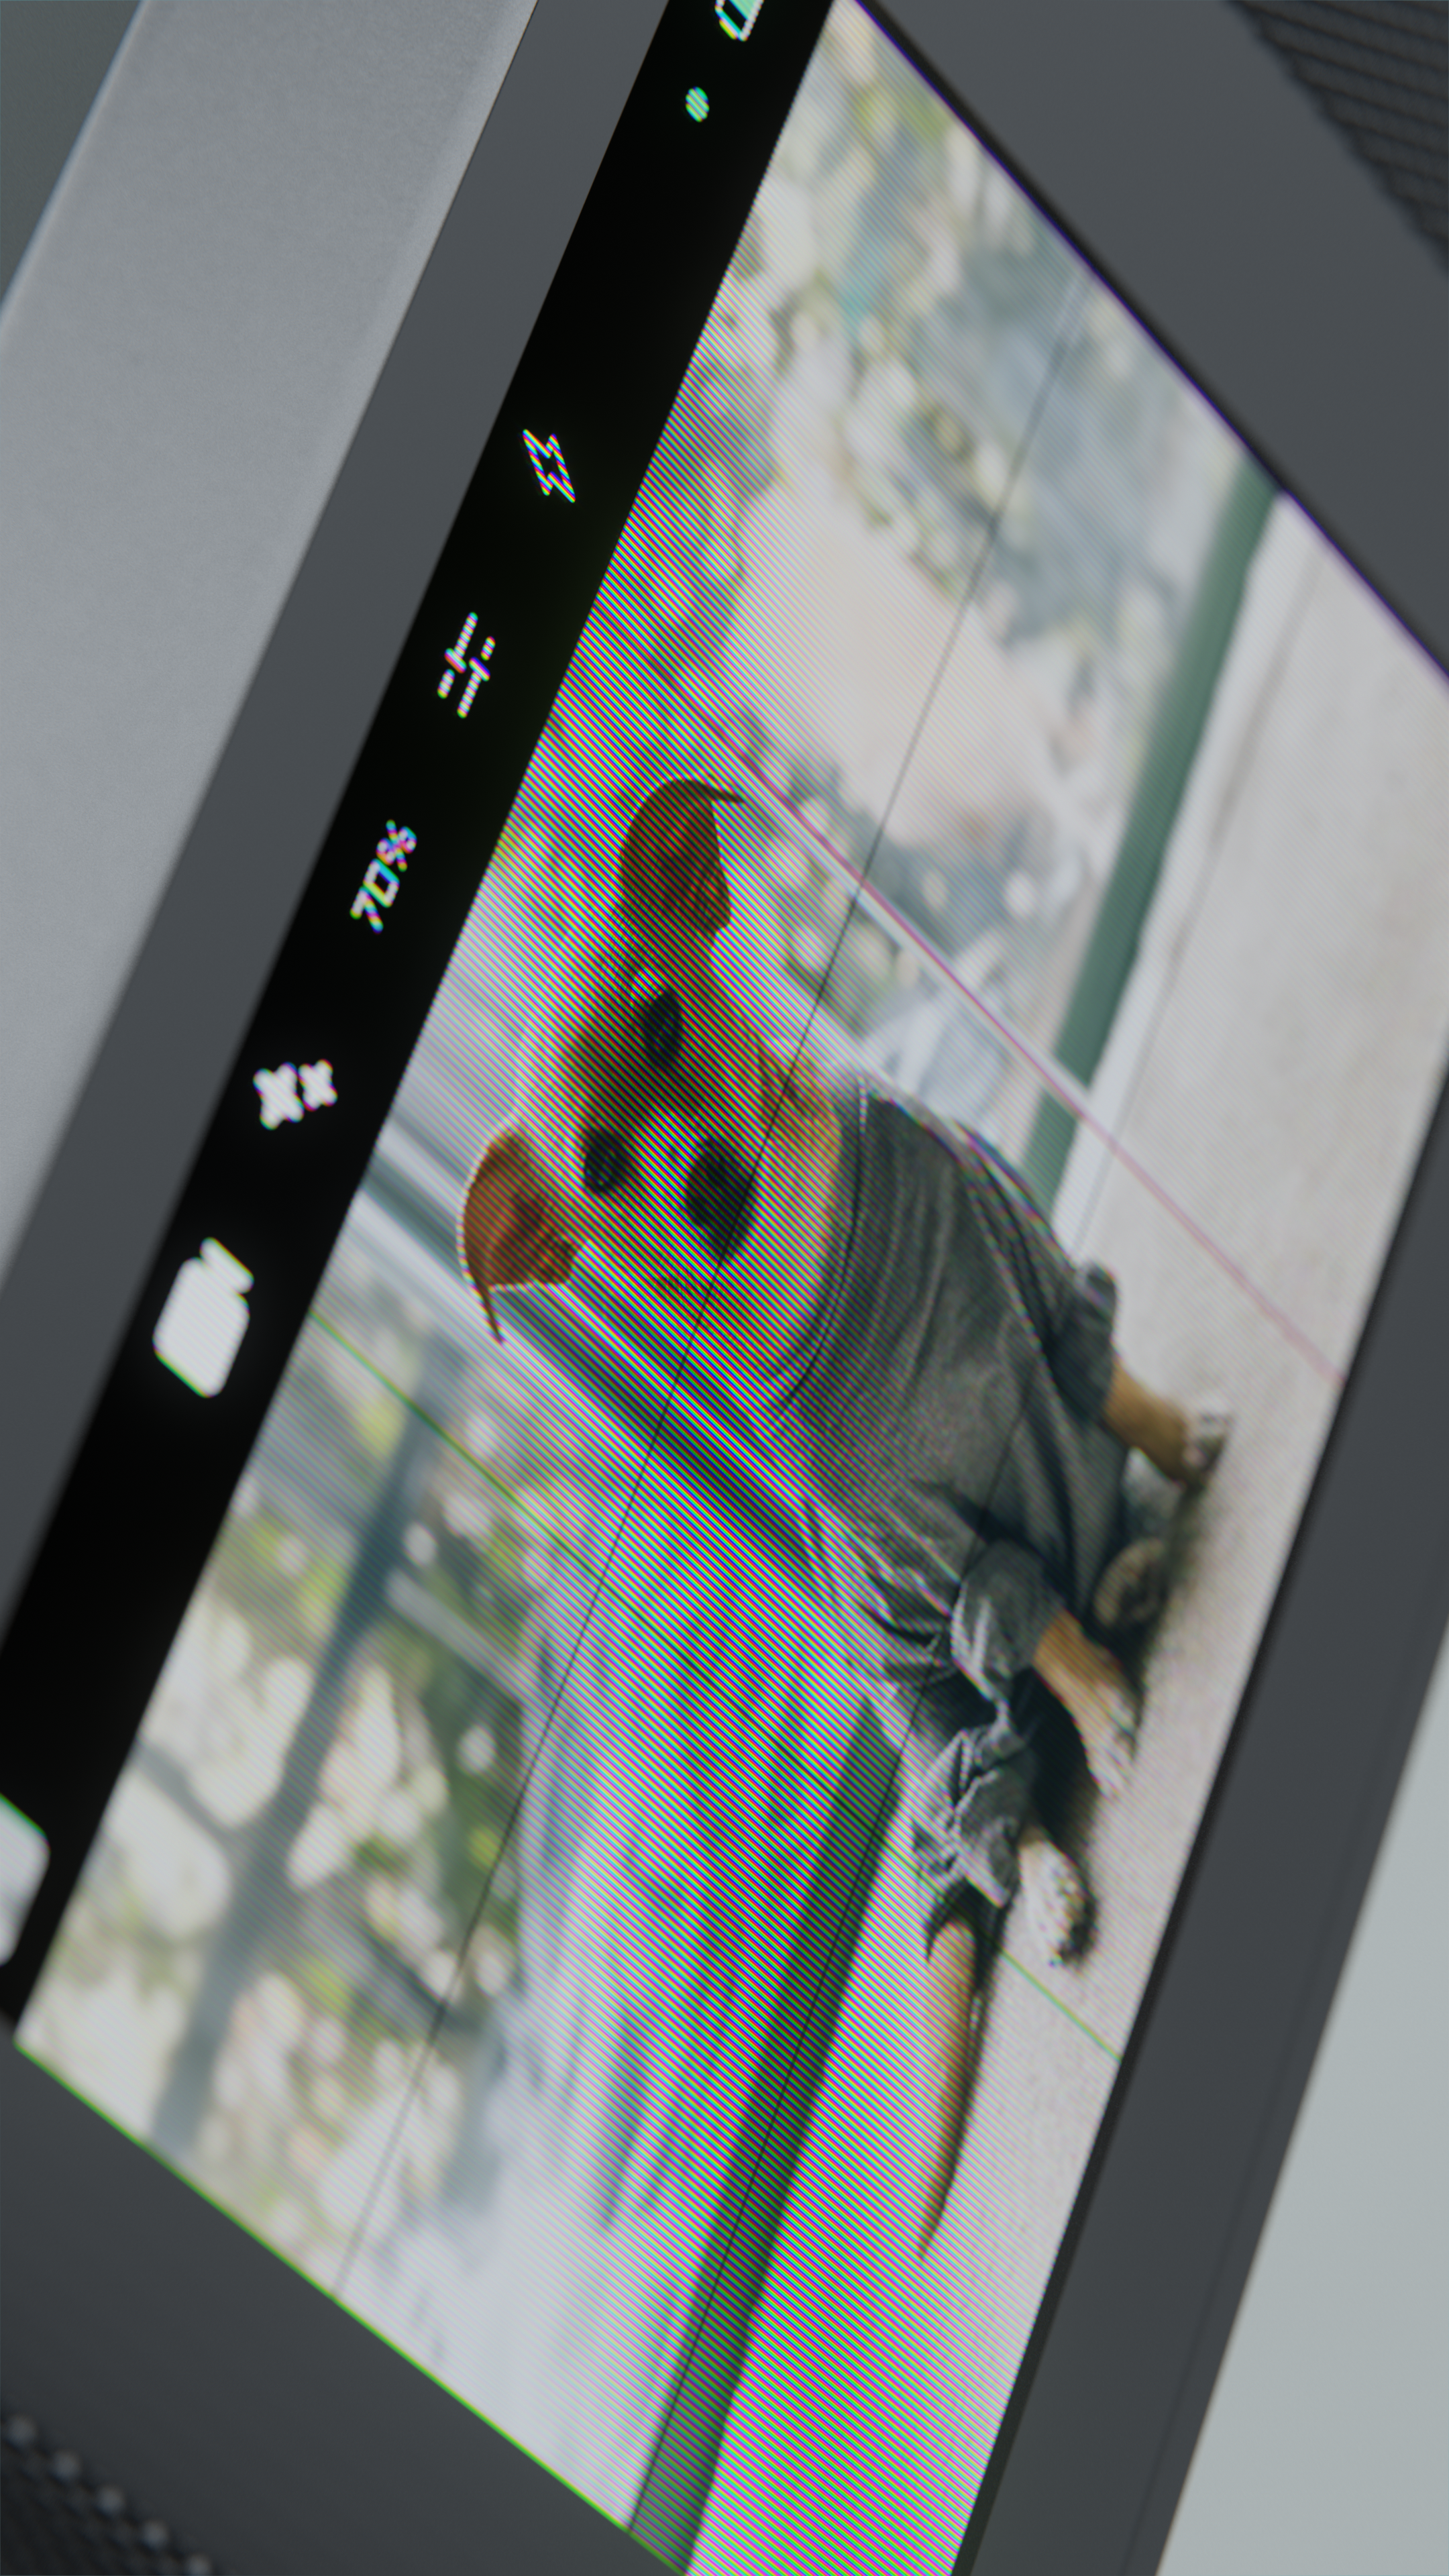
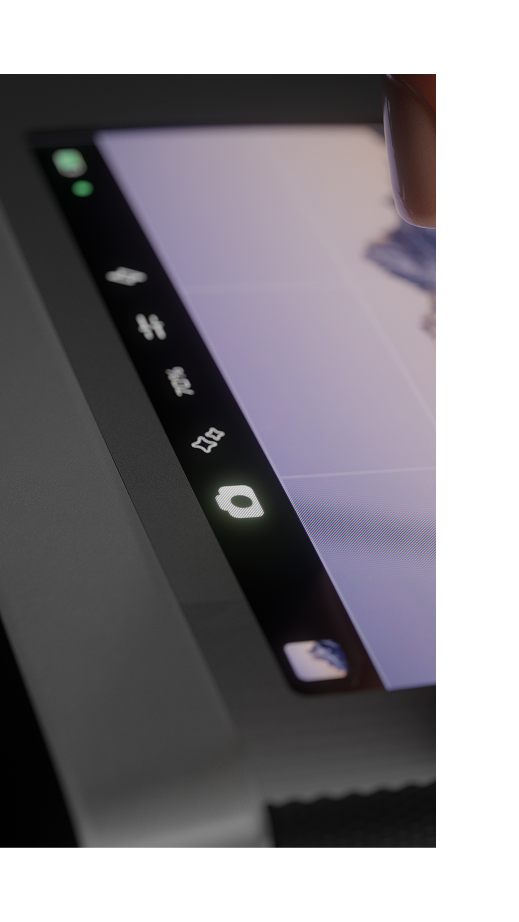
At the heart of Luminaire is the Chronos UI, a fully built-out interface designed to give you complete control over the camera experience. From adjusting settings and browsing a live-updating gallery to reviewing captures in the built-in media viewer, everything is fast, intuitive, and right at your fingertips.
Chronos UI isn’t just for Luminaire - it’s designed to be shared. The platform is intended to be open-sourced, inviting others to build on it, customize it, and extend it into new creative tools. It’s more than an interface; it’s a foundation for the future of Visionairy cameras.
Powered by a Neopixel Stick, the 8-LED array provides both a powerful flash as well as a status indicator to inform photograph-ees of what's happening camera-side.
There are dedicated animationsfor:
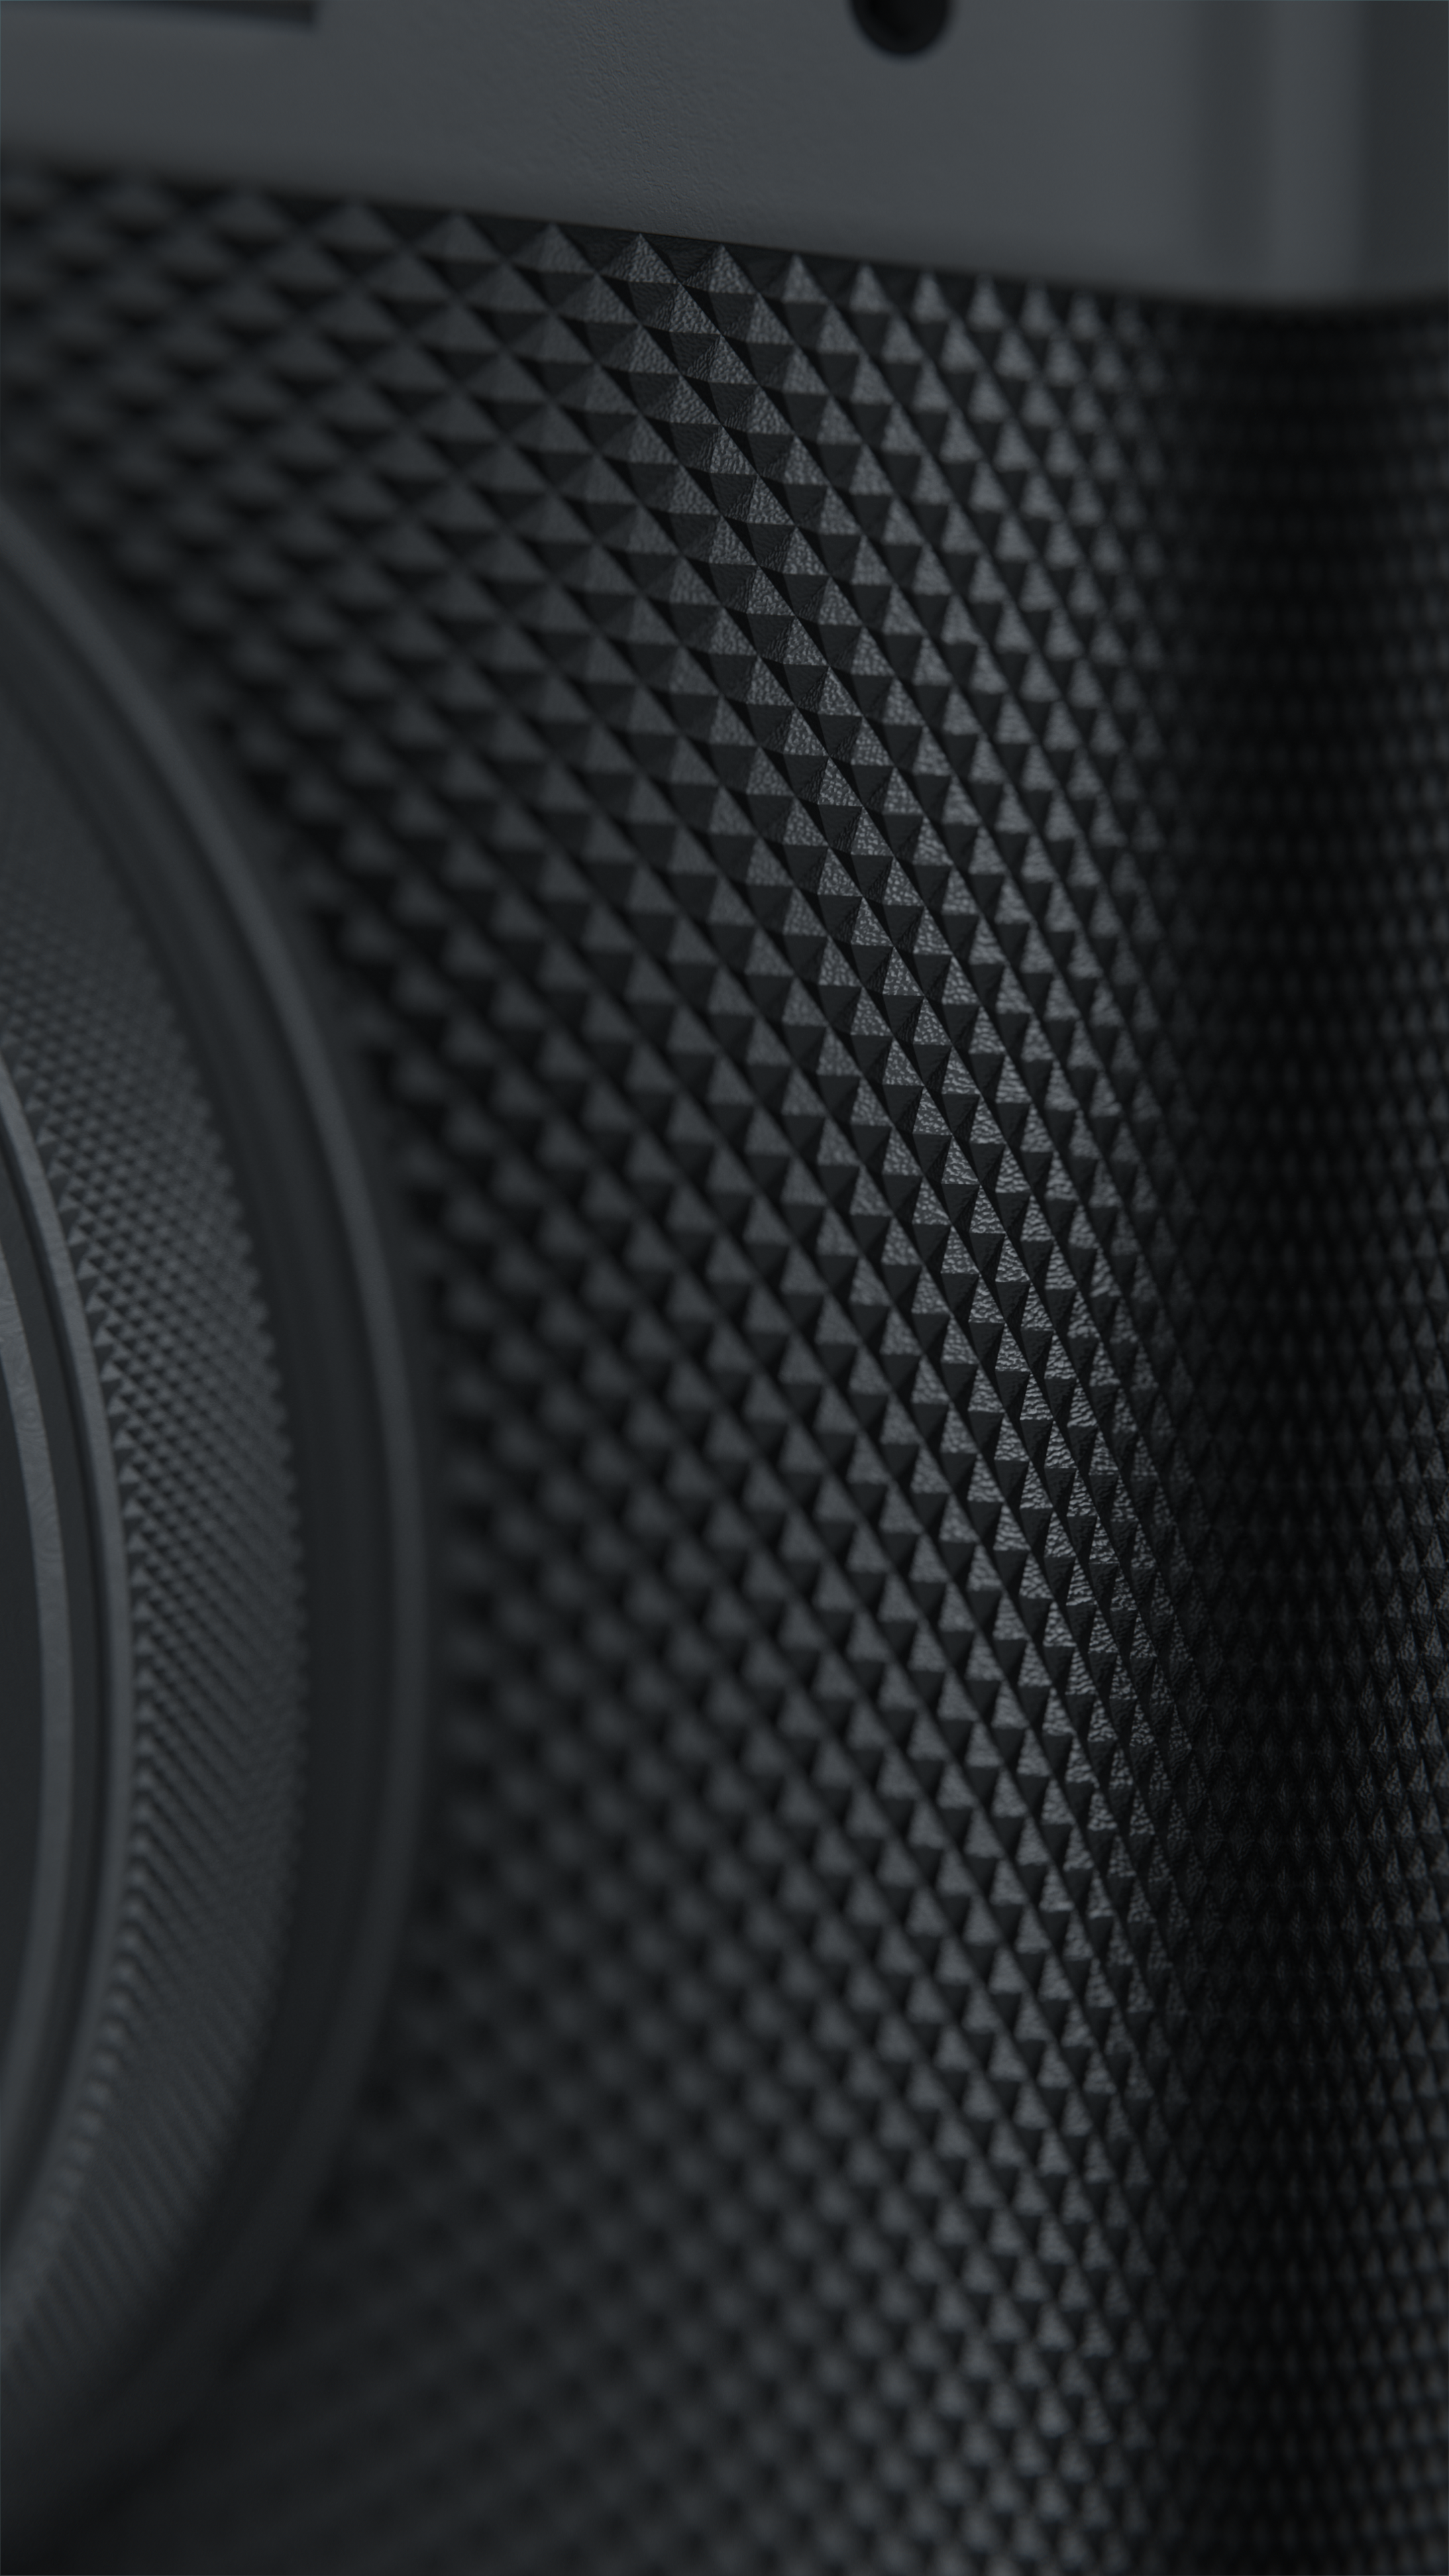
The Luminaire’s body features a knurled texture that’s printed directly into the shell — a detail taht took a bit of iteration to get correct. The result is a tactile, ultra-premium feel that elevates the camera beyond a prototype. It’s not just visually striking, it feels great in the hand, giving the device the same satisfying grip you’d expect from high-end industrial design.
Instagen has grown far beyond a single prototype, and the next step is opening it up to others. I’m currently working on making the cameras available as DIY build kits, complete with the necessary files, parts lists, and guides so that anyone can create one themselves.
In parallel, I’m open-sourcing the Chronos and Chronos-Headless apps, making it possible to run the cameras out of the box and giving the community a foundation to build on. The goal is to transform Visionairy cameras from a personal experiment into a platform for collaboration and creativity, where others can extend, remix, and push the work in directions I can’t imagine alone.
Oh, and I'm turning this into a mobile app :)
Watch this space! Thank you for reading.